

This topic describes how to configure internet access and VPC access for an Enterprise Dedicated Edition instance.
After an Enterprise Dedicated Edition instance is created, the default network configuration is to use internet access. If you need to use VPC access, you must configure it while the instance is in the In Use state.
On the page, specify the following parameters:
If the Enterprise Dedicated Edition instance needs to access resources within your VPC, enable reverse access.
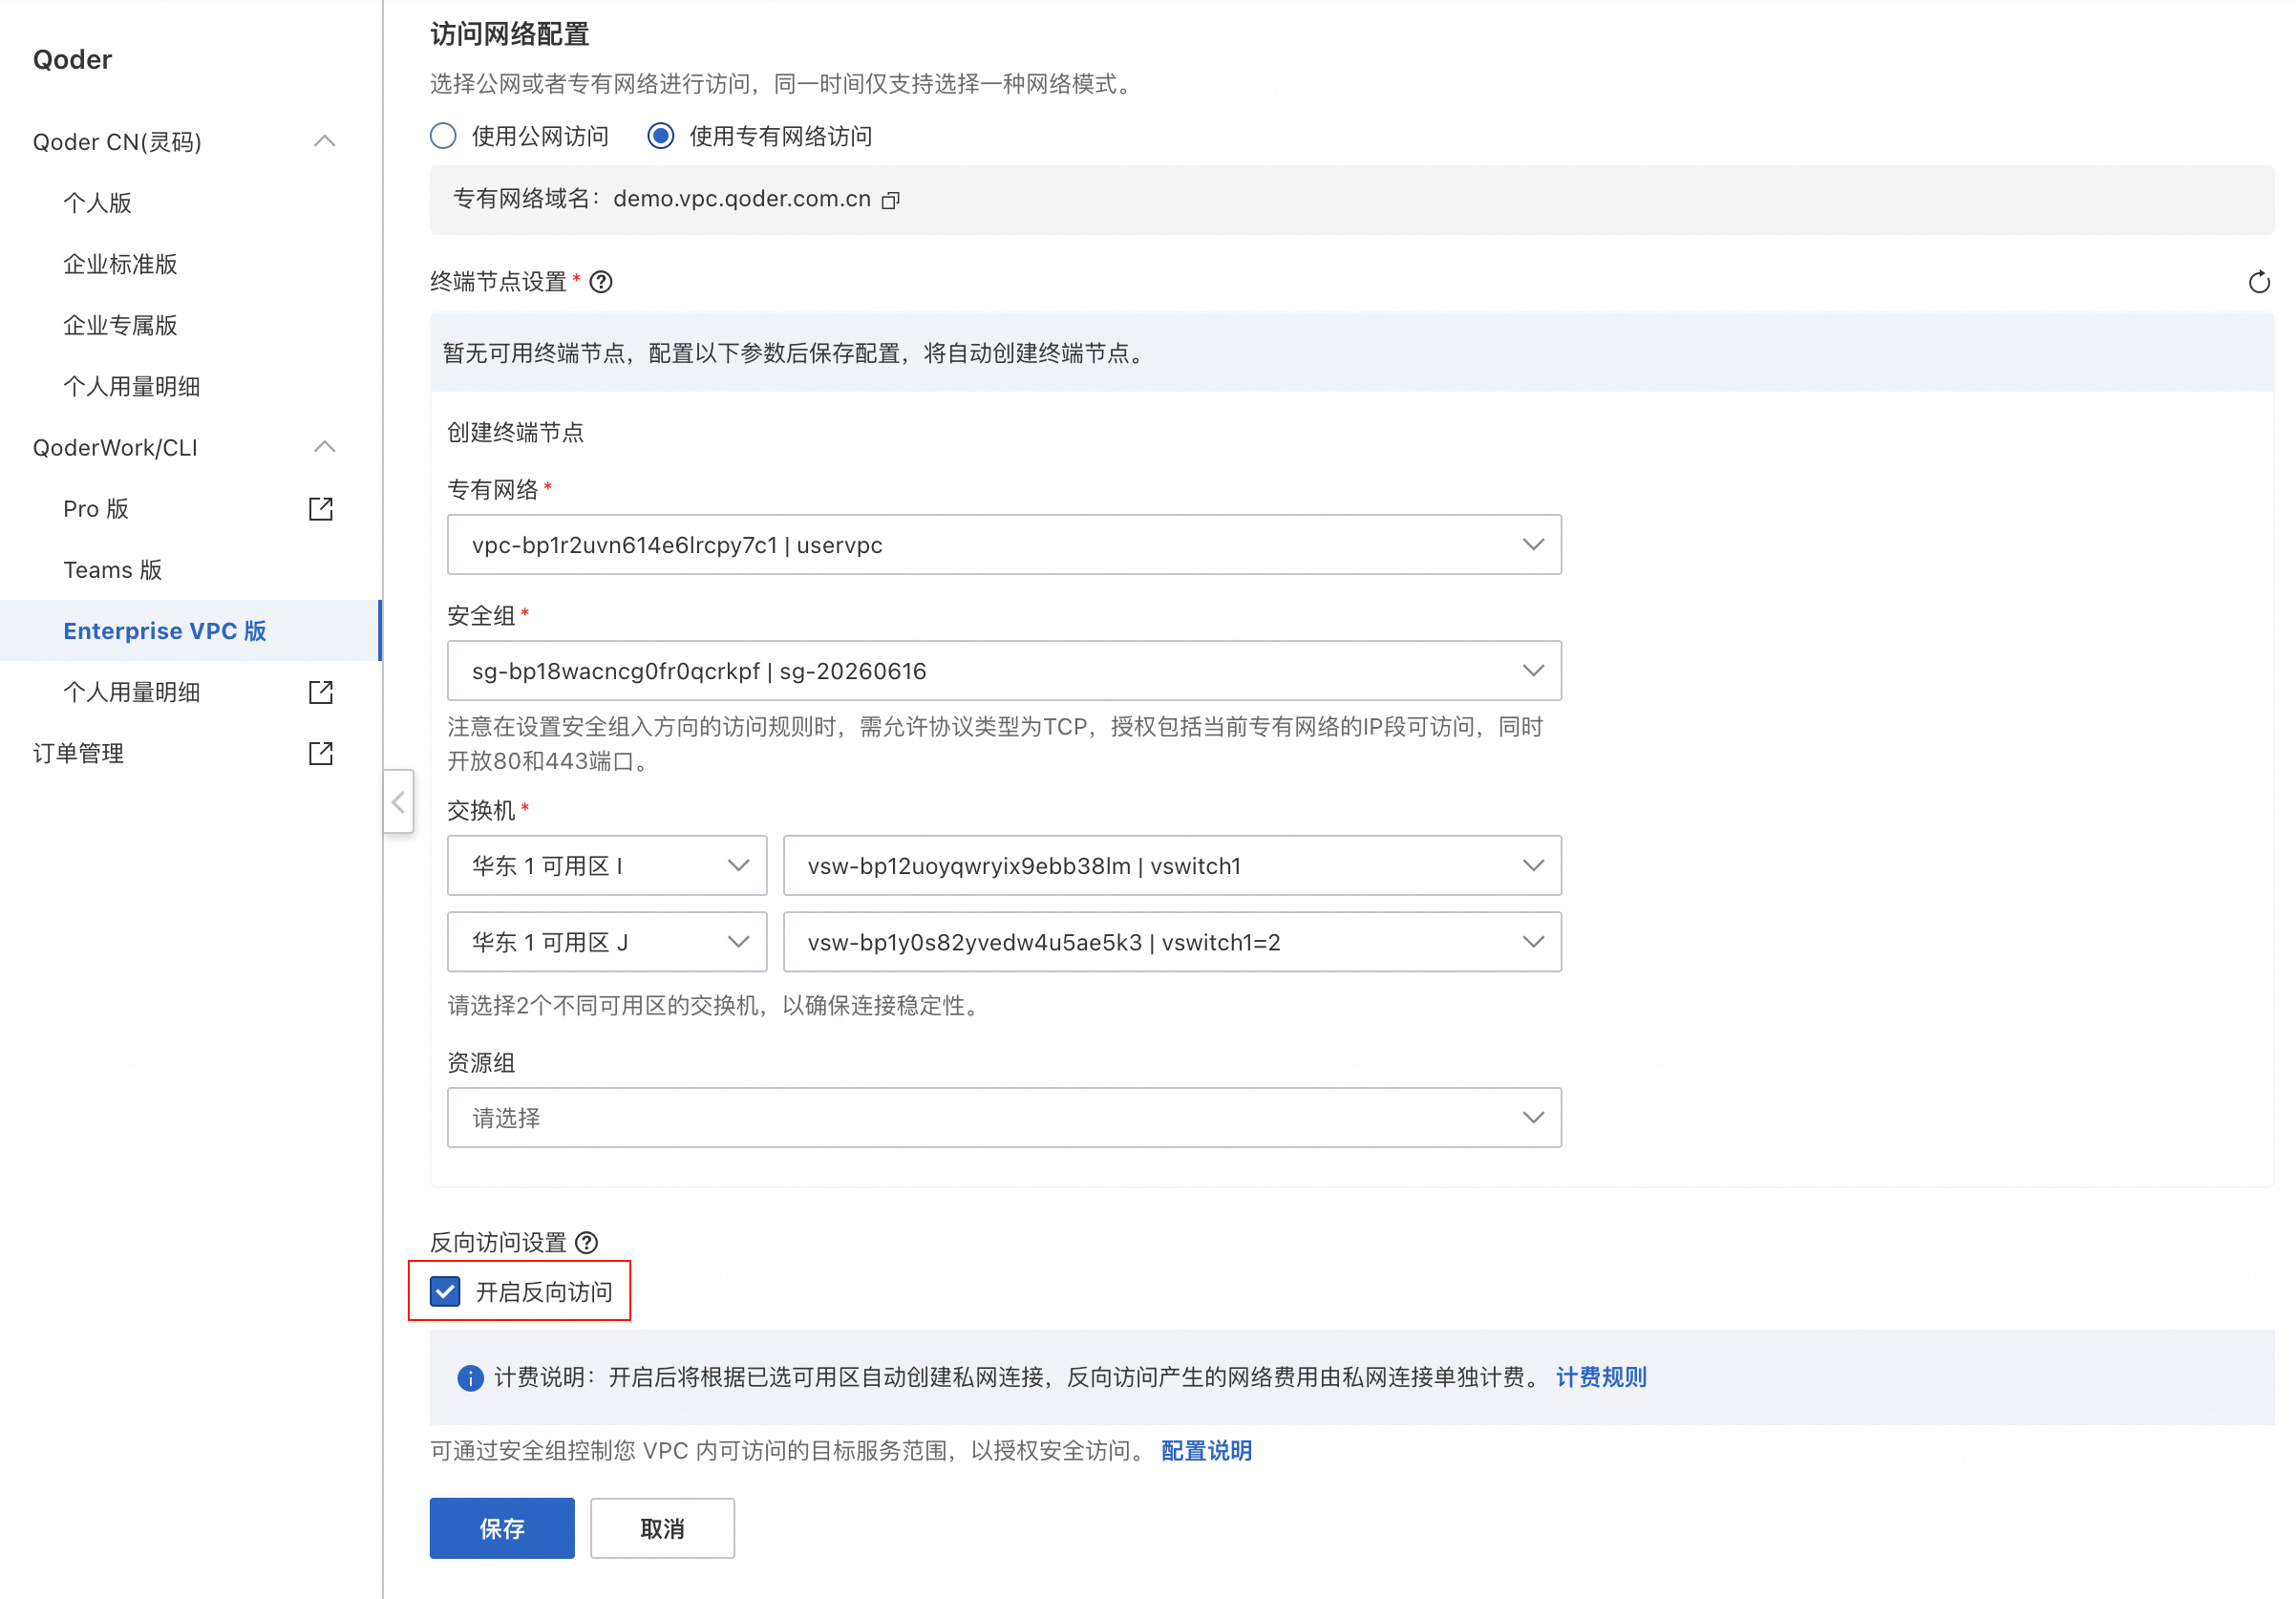 Select the Enable reverse access checkbox.
After you enable reverse access and save the configuration, use the endpoint's security group to control access to services in your VPC by configuring its inbound and outbound rules.
In the security group rules, add rules for inbound and outbound traffic to control access to your target services. For secure access, we recommend that you configure outbound rules to deny traffic by default and then add specific rules to allow traffic only to the required IP addresses and ports of your target services. For instructions on how to add security group rules, see Add a security group rule.
Click Save. This change restarts the instance, which will be temporarily unavailable for about 5 minutes. After you save the configuration, the system automatically creates an endpoint. If you enabled reverse access, the system also creates a dedicated security group.
Before you use the instance, ensure that the private domain name is resolvable. After the instance enters the stable In Use state, you can verify network connectivity by pinging its private domain name from your client environment.
You can find the private domain name, labeled as Private Domain Name, in the instance information on the Enterprise Management page.
After the configuration is complete, you can connect from your VPC and access the private domain name of the Enterprise Dedicated Edition instance to begin your work.
| Applicable version | Enterprise Dedicated Edition |
|---|
Configure network access
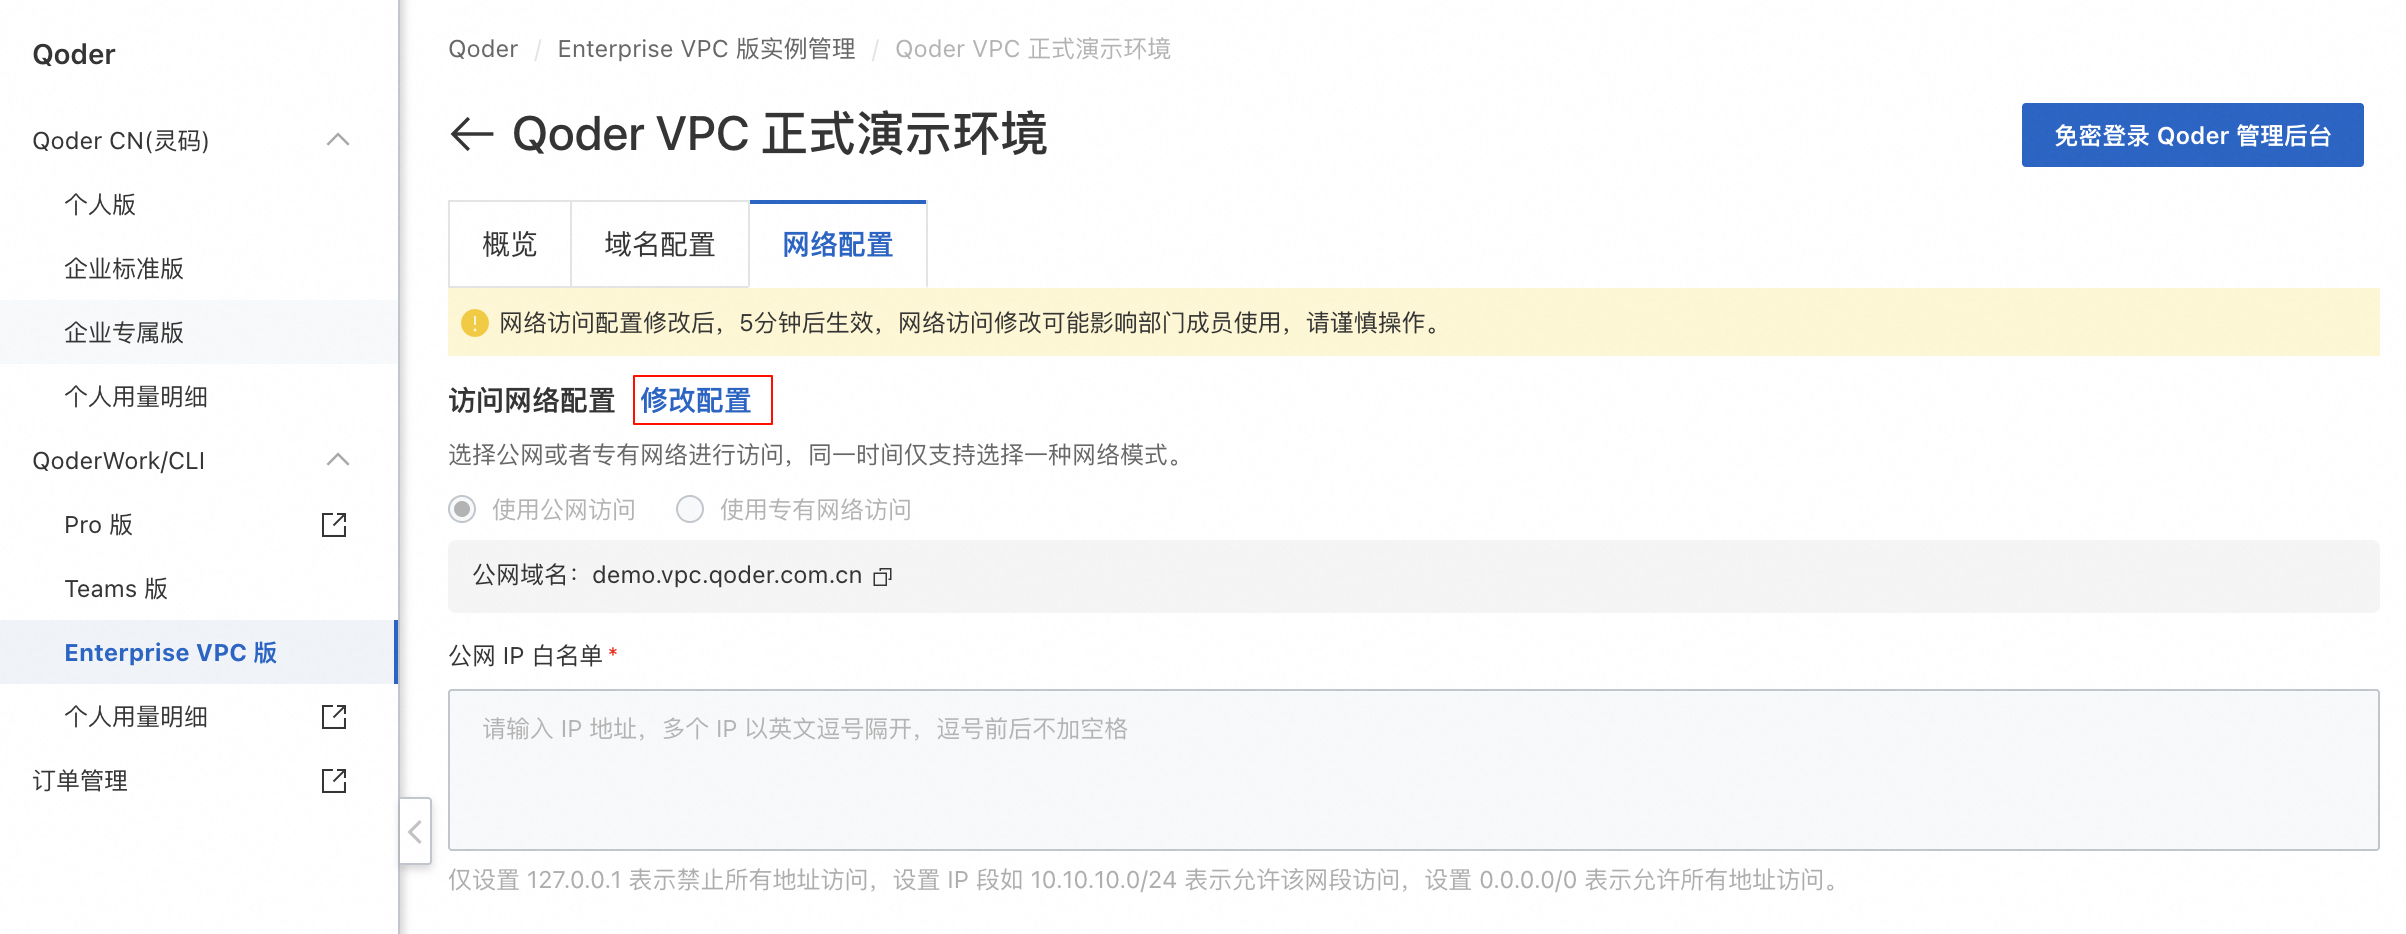
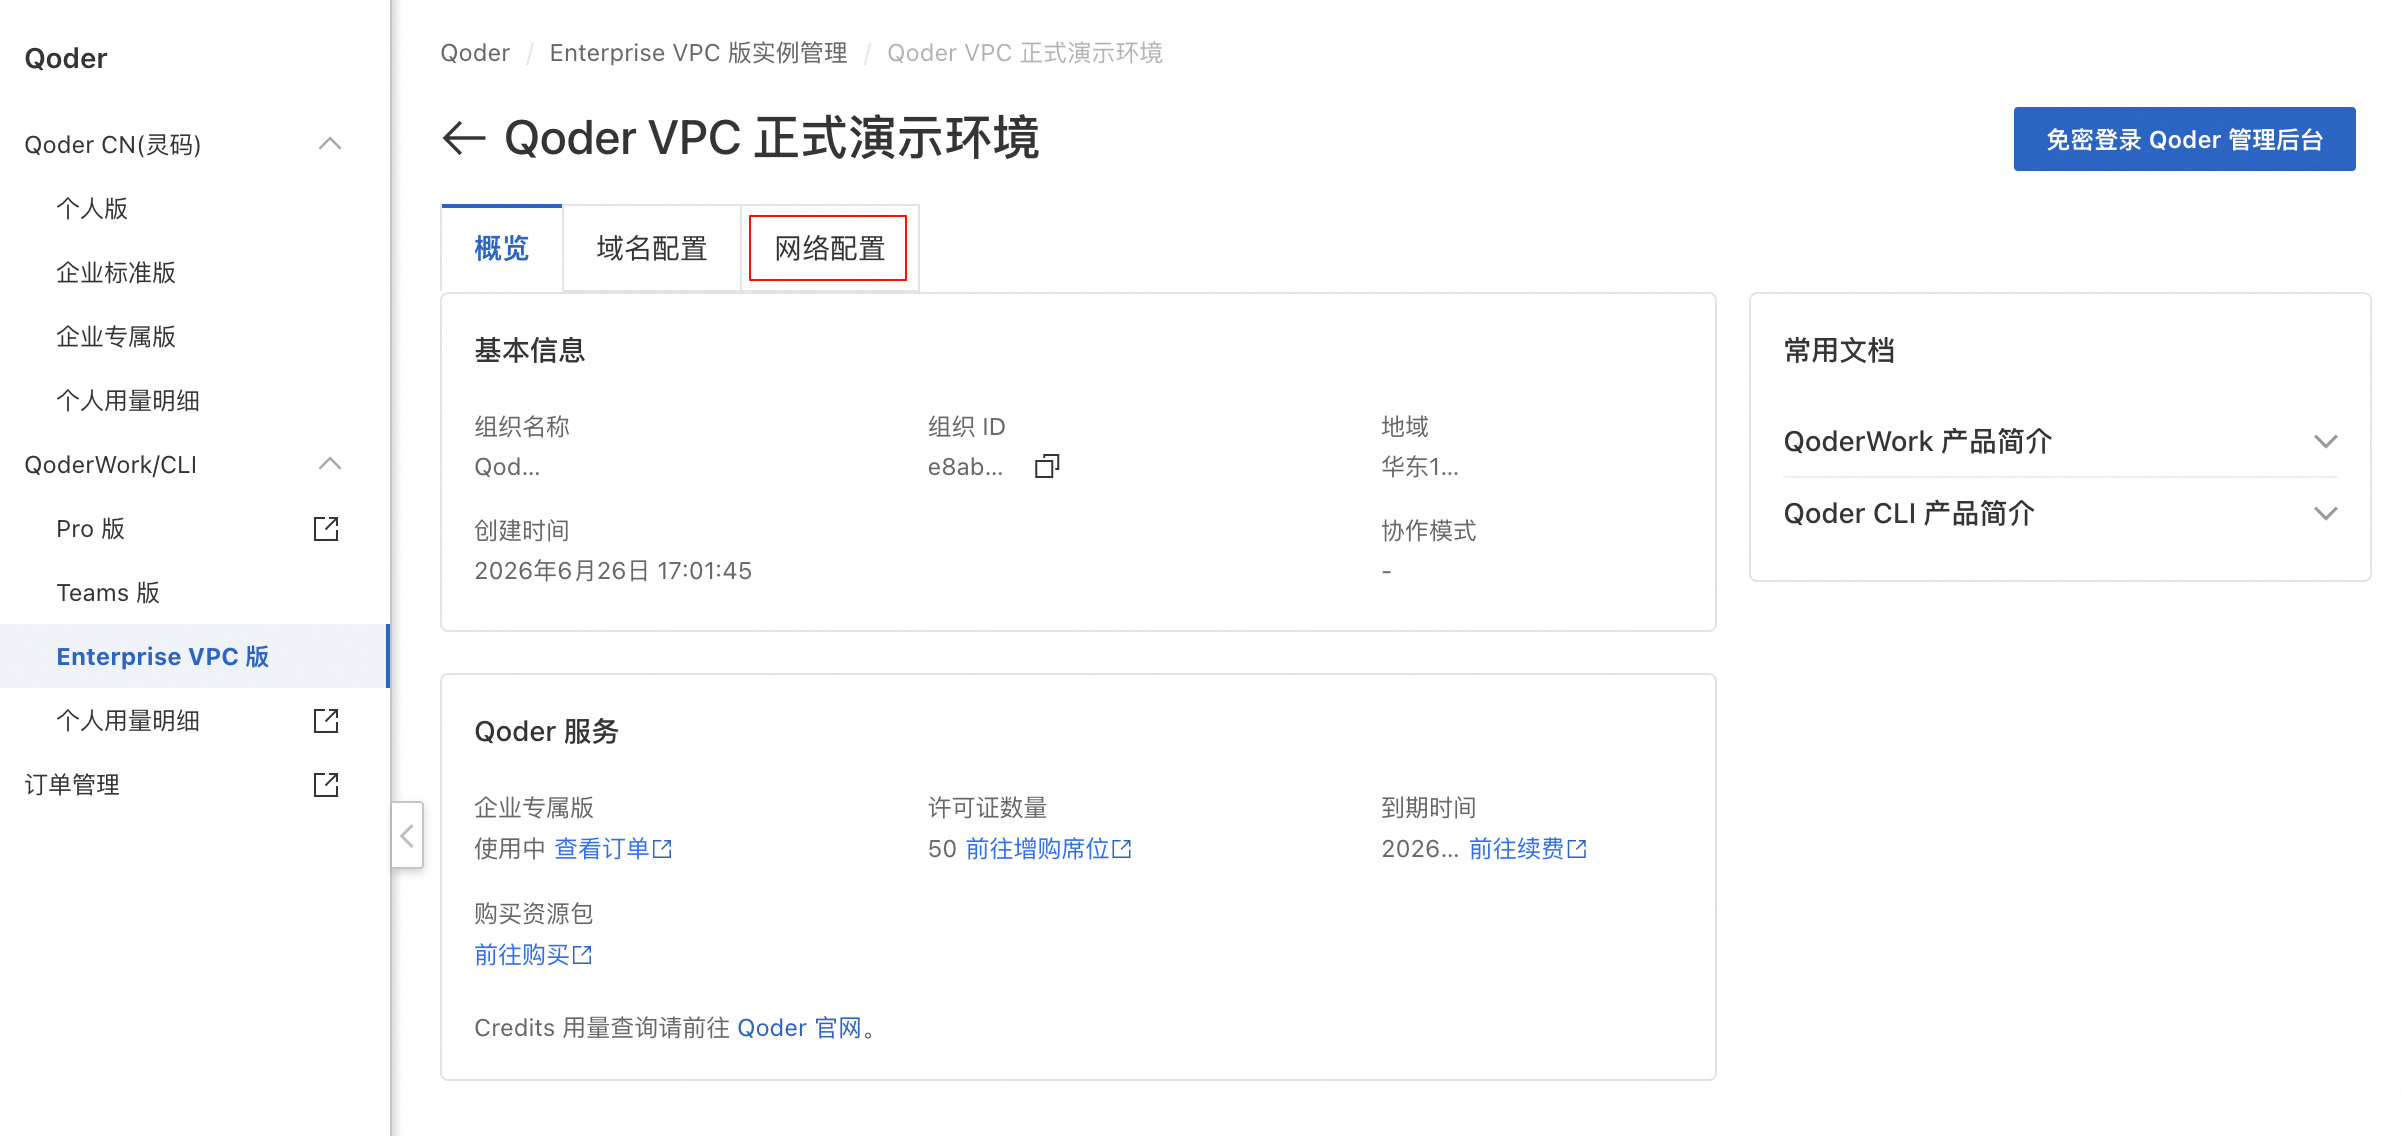
- Log on to the console. Select your Enterprise Dedicated Edition instance, and then access the instance to view its current network status. On the instance details page, on the Overview tab, find the public domain name in the Instance Information section and the status of internet access and VPC access in the Network Access Configuration section.
- Click Network Configuration.
- Click Modify Configuration to switch between internet access and VPC access. On the Network Configuration tab, the Network Access Configuration section shows the current mode is Use Internet access with the IP whitelist set to 0.0.0.0/0, which allows access from all IP addresses. A message at the top indicates network changes will take effect in about 5 minutes.
A service-linked role is automatically created. For more information, see Service-linked role (AliyunServiceRolePolicyForRdcDedicated).
Configure internet access
- Select the option to enable internet access.
- Configure the IP whitelist:
- For security, you must configure an IP whitelist to enable internet access.
- To allow only local access, enter 127.0.0.1.
- To allow access from a specific IP address range, enter a CIDR block, such as 10.10.10.0/24.
- To allow access from all IP addresses, enter 0.0.0.0/0.
- Separate multiple IP addresses or CIDR blocks with commas. Do not add spaces before or after the commas.
- Click OK to save the configuration.
You can add a maximum of 50 IP addresses or CIDR blocks to the IP whitelist. The new configuration takes effect in about 5 minutes. Changes to network access may affect your team members. Proceed with caution.
Configure VPC access
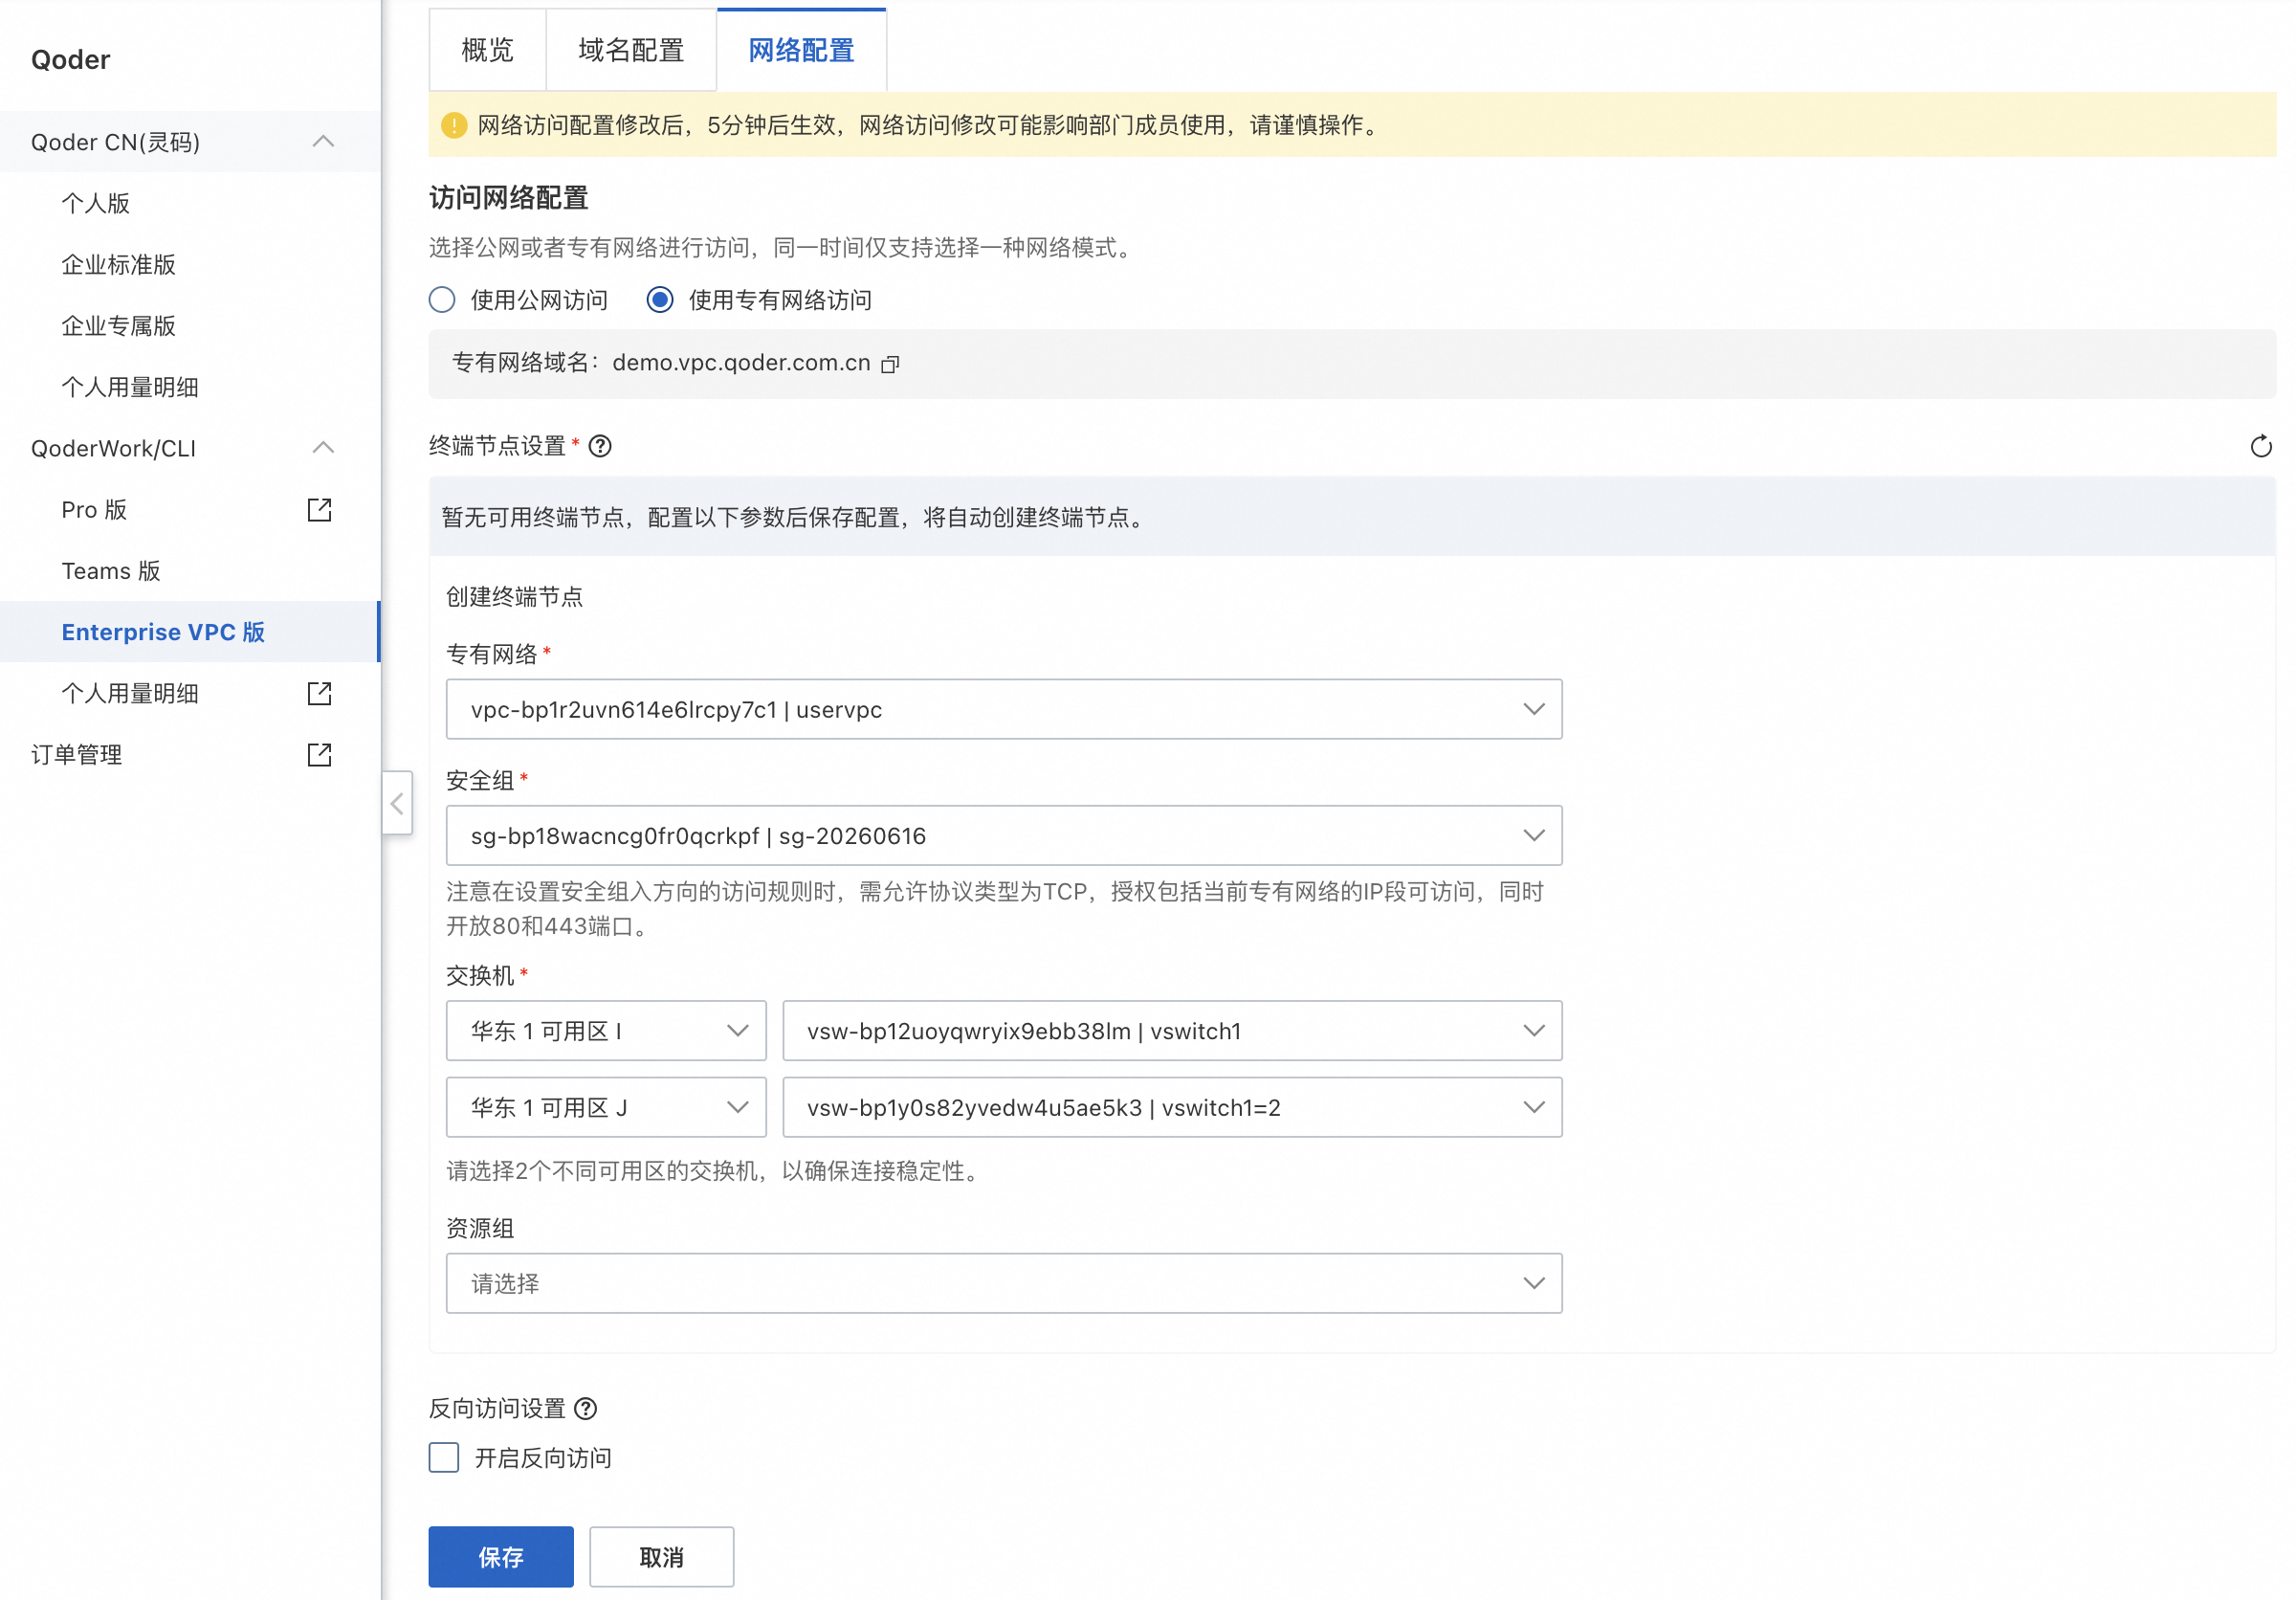
- Select Use VPC access.
- Create an endpoint: If no endpoints are available, you must create one by specifying the required parameters. If you do not have the permissions to configure a VPC, follow the on-screen instructions to grant the required permissions before you proceed.
Create an endpoint
On the page, specify the following parameters:
- VPC: Select a VPC. If a VPC does not exist, you can create one. For more information, see Create and manage a VPC. Note that the availability zone of the vSwitch must be the same as the availability zone specified on the network configuration page. Otherwise, you cannot find the vSwitch information. VPC: Create a VPC with an IPv4 CIDR block of 10.0.0.0/16. vSwitch: Configure two vSwitches. For the first vSwitch, set the name to vSwitchA, select China (Hangzhou) Zone I as the availability zone, and set the IPv4 CIDR block to 10.0.0.0/24. For the second vSwitch, set the name to vSwitchA, select China (Hangzhou) Zone J as the availability zone, and set the IPv4 CIDR block to 10.0.2.0/24. VPC (Required): Select an existing VPC. vSwitch (Required): Select the vSwitches in China (Hangzhou) Zone I and China (Hangzhou) Zone J. You must select two vSwitches in different availability zones to ensure connection stability.
- Security group: Select an existing security group. If you do not have a security group, create one. When you create a security group, configure its inbound access rules to authorize access from the IP range of the current VPC and open ports 80 and 443. On the security group creation page, enter a Security Group Name, such as sg-20240626, and select Basic Security Group for Security Group Type. In the Inbound tab of the Access Rules section, click Quick Add, add rules for the HTTP (port 80) and HTTPS (port 443) ports, set Authorization Policy to Allow, and enter the IP address range of your VPC for Source. Note that 0.0.0.0/0 allows access from all IP addresses. Use this value with caution.
- resource group (Optional): Select an existing resource group.
Enable reverse access (optional)
If the Enterprise Dedicated Edition instance needs to access resources within your VPC, enable reverse access.
To enable reverse access, do not use the 172.16.0.0/12 CIDR block for your VPC to avoid CIDR block conflicts.
Configure reverse access security rules
After you enable reverse access and save the configuration, use the endpoint's security group to control access to services in your VPC by configuring its inbound and outbound rules.
In the security group rules, add rules for inbound and outbound traffic to control access to your target services. For secure access, we recommend that you configure outbound rules to deny traffic by default and then add specific rules to allow traffic only to the required IP addresses and ports of your target services. For instructions on how to add security group rules, see Add a security group rule.
Billing for reverse access: When you enable reverse access, the system automatically creates a PrivateLink for each selected availability zone. PrivateLink bills you separately for the network traffic from these connections. For more information, see Billing.