

Understand QoderWake work management, Waker resources, collaboration modes, and the complete path from creation to rollout.
QoderWake uses digital employees, called Wakers, to take on ongoing work. The product is organized around two perspectives: manage and follow work from the task perspective, and configure Wakers, Groups, and capabilities from the user perspective.
For a first run, create one Waker with a clear responsibility, validate it in a chat, and then add capabilities and resources, create a Group, connect IM, or formalize stable work as Autonomous Work or a WakerFlow.
 The Dashboard is primarily for observing and handling work. Return to the source chat, Autonomous Work item, or WakerFlow when you need to create, edit, retry, or inspect the full context of a task.
A Waker is a digital employee with a defined responsibility. Its behavior is shaped by its role configuration, execution environment, memory, Skills, connectors, knowledge bases, projects, and permissions. Use one Waker for one stable role or service boundary.
A Group brings together complementary Wakers and designates a Leader to assign work and consolidate results. It is appropriate for work such as implementation, testing, and review that requires several roles. When tasks have dependencies or shared write access, define the execution order, primary editor, and human confirmation point.

Installing a resource does not automatically make it available to every Waker. Assign it to the intended Waker, check permissions, and validate it in a new chat. Adding unrelated resources can increase routing, retrieval, and permission risks.
The Waker detail page lets you manage the following information:
Choose a preset or create a custom Waker. Define responsibilities, accepted inputs, deliverables, boundaries, and actions that require human confirmation.
Confirm that the Waker runs on the intended device. Tasks that need local files require the device to be online and the directory to be accessible.
Add only the Skill, connector, knowledge base, and project required for the first validation task.
Start with a read-only task, then validate controlled write operations, out-of-scope refusals, and high-risk confirmations. Inspect the actual artifact instead of relying only on the final reply.
Create a Group, connect IM, or orchestrate a WakerFlow when needed. Run a small validation every time a new entry point is added.
Create Autonomous Work only after inputs, outputs, and failure handling are stable. Retest after changing the role, resources, permissions, application version, or project location.
For a weekly website quality review:
Work management
| Entry | What it solves | Best for |
|---|---|---|
| Dashboard | Review status, required actions, and results across tasks | Tracking several jobs and handling confirmations or failures |
| @Waker | Connect an IM chat to several specialized Wakers | Group collaboration, direct-message delegation, and ongoing work |
| Autonomous Work | Start work from a schedule, event, or API | Reports, inspections, external events, and system integrations |
Wakers and Groups
A Waker is a digital employee with a defined responsibility. Its behavior is shaped by its role configuration, execution environment, memory, Skills, connectors, knowledge bases, projects, and permissions. Use one Waker for one stable role or service boundary.
A Group brings together complementary Wakers and designates a Leader to assign work and consolidate results. It is appropriate for work such as implementation, testing, and review that requires several roles. When tasks have dependencies or shared write access, define the execution order, primary editor, and human confirmation point.
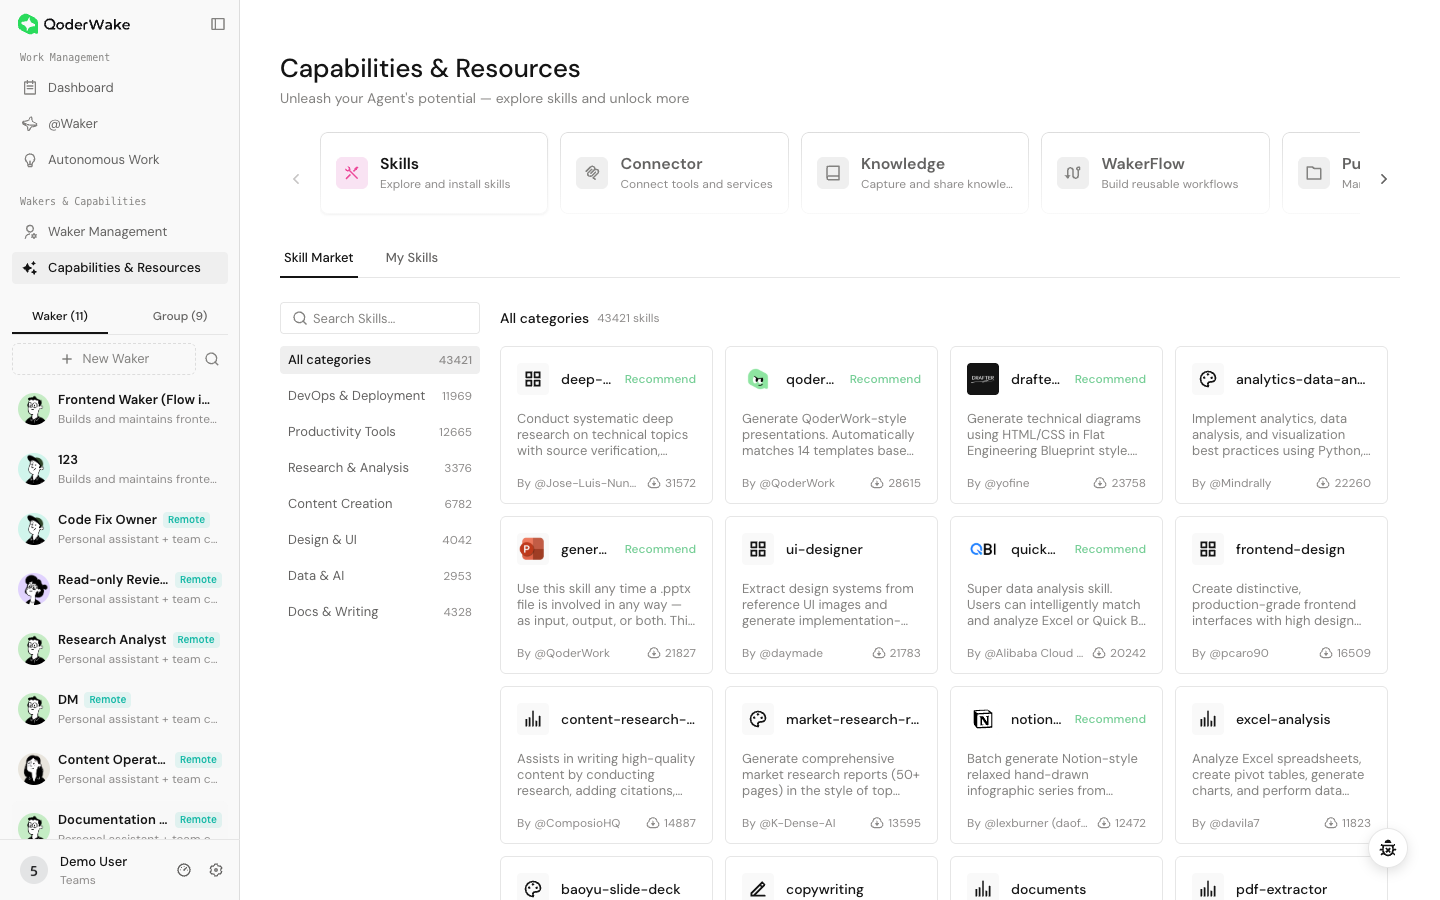
Capabilities and resources
| Resource | Purpose | Where to configure it |
|---|---|---|
| Skills | Reusable working methods | Capabilities & Resources → Skills |
| Connectors | External applications, MCP services, and built-in tools | Capabilities & Resources → Connectors |
| Knowledge Base | Stable, searchable, and shareable information | Capabilities & Resources → Knowledge Base |
| WakerFlow | Multi-stage, multi-Waker, or human-in-the-loop workflows | Capabilities & Resources → WakerFlow |
| Public Projects | Workspaces reusable by multiple Wakers | Capabilities & Resources → Public Projects |
| Private Projects | Workspaces used by one Waker | Waker details → Projects |
| Memory | Role profile, preferences, and rules retained across tasks | Waker details → Memory |
Waker detail page
The Waker detail page lets you manage the following information:
- Home: identity, availability, activity, statistics, and resource overview.
- Work: Dashboard and Autonomous Work.
- Memory & Learning: global memory and self-evolving Skills.
- Capabilities & Resources: Skills, connectors, WakerFlow, knowledge bases, and projects.
- Collaboration & Management: permissions and settings.
Choose the right working mode
- The task is still changing: start with a chat and confirm input, steps, boundaries, delivery format, and acceptance criteria.
- Several roles must collaborate: create a Group; use WakerFlow when stages, branches, or confirmation points must be explicit.
- The team works in IM: configure an IM connection and enable @Waker so one entry point can route work to different Wakers.
- The work is stable and repeatable: create Autonomous Work and select a schedule, event, or API trigger.
From creation to rollout
1. Create the role
Choose a preset or create a custom Waker. Define responsibilities, accepted inputs, deliverables, boundaries, and actions that require human confirmation.
2. Bind the execution environment
Confirm that the Waker runs on the intended device. Tasks that need local files require the device to be online and the directory to be accessible.
3. Add the minimum resources
Add only the Skill, connector, knowledge base, and project required for the first validation task.
4. Validate in a chat
Start with a read-only task, then validate controlled write operations, out-of-scope refusals, and high-risk confirmations. Inspect the actual artifact instead of relying only on the final reply.
5. Extend collaboration
Create a Group, connect IM, or orchestrate a WakerFlow when needed. Run a small validation every time a new entry point is added.
6. Automate and maintain
Create Autonomous Work only after inputs, outputs, and failure handling are stable. Retest after changing the role, resources, permissions, application version, or project location.
Typical example
For a weekly website quality review:
- Create a Web Quality Engineer Waker and assign the website project and browser capability.
- Run one read-only review in a chat and confirm the report structure and acceptance criteria.
- If remediation and verification require separate roles, create a Group or WakerFlow.
- Run the process manually and inspect the report, screenshots, and test results.
- Create weekly Autonomous Work and set a maximum run count or deadline if needed.
- Retest after an application update or project-path change.
Before starting
- The Waker is available, and required files are on an accessible execution environment.
- The workspace or project contains only content needed for the task.
- Skills, connectors, knowledge bases, and permissions passed a minimal validation.
- Code merges, production changes, external publishing, deletion, and payments retain human confirmation.
- Test data, screenshots, and shared artifacts do not expose credentials, personal data, or restricted business information.