

Install Skills, connect external services, and assign resources to Wakers with least-privilege access.
Capabilities & Resources centrally manages reusable Skills, connectors, knowledge bases, WakerFlows, and public projects. A Skill defines a repeatable working method; a connector lets a Waker call an external application, MCP service, or built-in tool.
A resource appearing in the marketplace or My resources does not mean every Waker can use it. The complete path is: install or create → assign to a Waker → check permissions → validate in a new chat.
Path: left navigation → Capabilities & Resources. Use the tabs to switch resource types. A Waker's Skills and Connectors pages manage only the resources assigned to that Waker.
Do not store tokens in a Skill, and do not use a connector description as a business knowledge base.
Use the upload entry in the resource center or the target Waker. Depending on the page, the package can be a Markdown file or an archive containing
Path: Waker Management → target Waker → Memory & Learning → Self-evolving Skill.
Self-evolution turns a successfully completed complex task into a reusable way of working. When enabled, the Waker reviews suitable completed tasks, updates an existing evolving Skill first, and creates a new Skill only when necessary. This page contains Skills summarized by the Waker during tasks and uploaded Skills for which Allow self-evolution was explicitly enabled.
For Skills that support version management:
Installed does not mean ready. Troubleshoot in the order install → authorize → enable → connect → invoke.
Browser Connector lets a Waker read or operate authorized browser tabs for page checks, form assistance, and web research. It does not automatically receive the entire browsing history and works only in a connected, authorized browser environment.
Start a new chat and ask the Waker to read the title and summarize the structure of the currently authorized tab. Confirm it selected the intended tab before testing clicks, typing, or downloads.
Sending, submitting, deleting, purchasing, publishing, and account-setting changes are high-impact browser operations. The Waker should state the target, impact, and recovery plan, then wait for human confirmation.
When the page provides manual or JSON configuration:
The resource center answers “what capabilities are available”; a Waker detail page answers “what this Waker may use.”
Completion check: the resource is available, the target Waker uses the correct capability in a new chat, permissions remain minimal, and test objects are not confused with production objects.
Open Capabilities & Resources
Path: left navigation → Capabilities & Resources. Use the tabs to switch resource types. A Waker's Skills and Connectors pages manage only the resources assigned to that Waker.
Choose the right resource
| Need | Use |
|---|---|
| Apply a repeatable method to a class of tasks | Skill |
| Access an external app, account, or MCP service | Connector |
| Search stable information repeatedly | Knowledge Base |
| Orchestrate multi-stage or multi-Waker work | WakerFlow |
| Provide a reusable code or document workspace | Project |
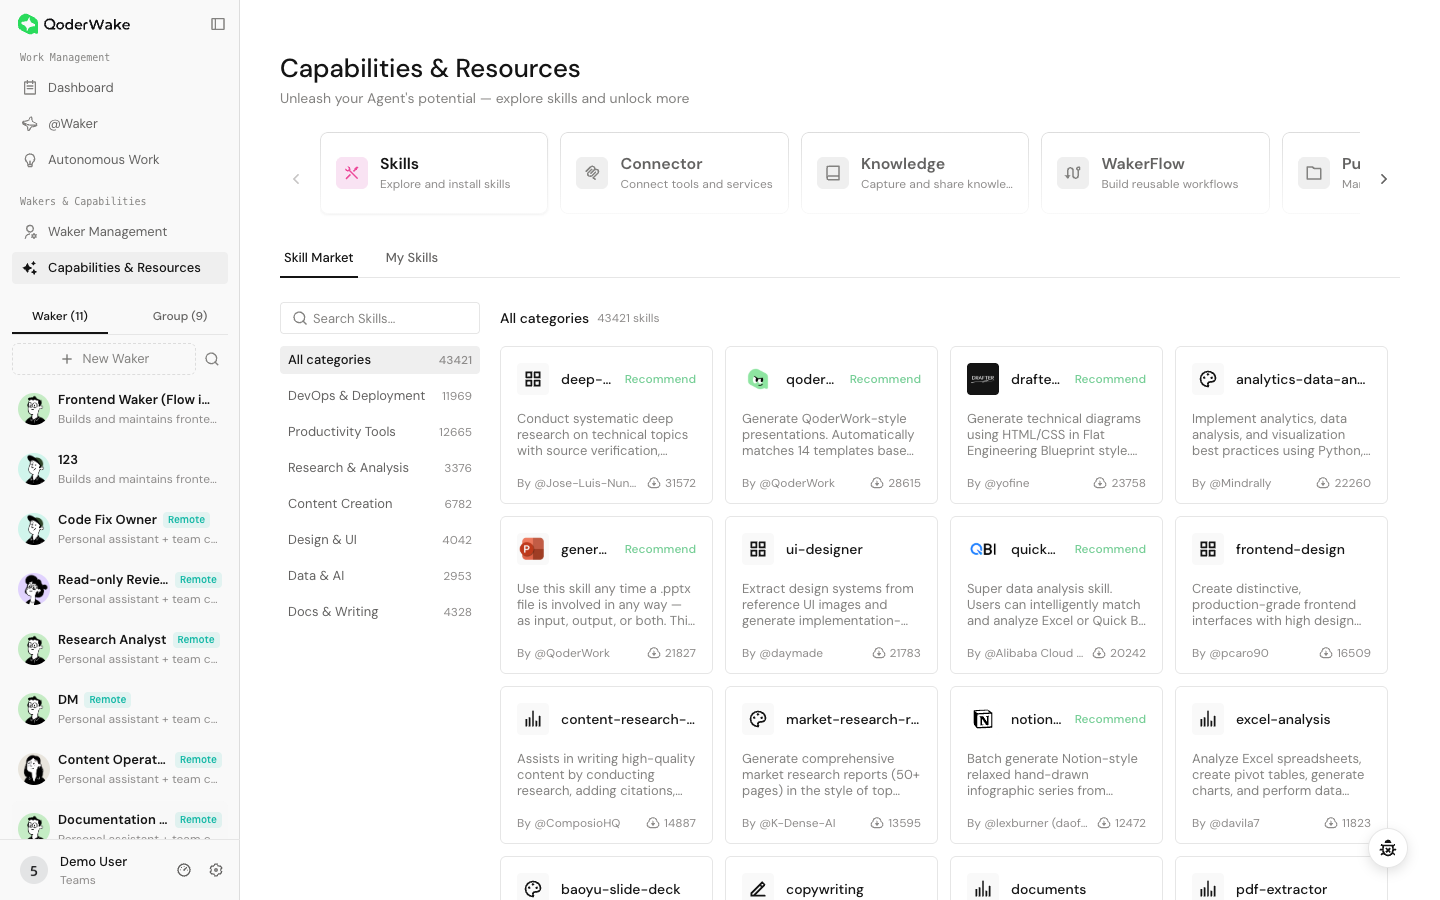
Install a Skill from the marketplace
- Open Skills → Skill Marketplace.
- Search or filter for the capability. Install counts and recommendations are signals, not a security review.
- Open the detail page and read the use cases, triggers, source, included files, and scripts.
- Confirm that file access, network access, and external tools are appropriate for the environment.
- Install the Skill and check its status and version under My Skills.
- Open the target Waker → Skills and add or confirm the Skill.
- Start a new chat and run one low-risk task that directly matches the Waker's responsibility.
Upload your own Skill
Use the upload entry in the resource center or the target Waker. Depending on the page, the package can be a Markdown file or an archive containing SKILL.md and required resources.
Before uploading, check:
- the name, description, and trigger conditions in
SKILL.md; - scripts that write files, access the network, or invoke commands;
- relative paths and required bundled resources;
- credentials, personal data, and private addresses;
- conflicts with instructions in existing Skills.
Manage self-evolving Skills
Path: Waker Management → target Waker → Memory & Learning → Self-evolving Skill.
Self-evolution turns a successfully completed complex task into a reusable way of working. When enabled, the Waker reviews suitable completed tasks, updates an existing evolving Skill first, and creates a new Skill only when necessary. This page contains Skills summarized by the Waker during tasks and uploaded Skills for which Allow self-evolution was explicitly enabled.
- Turn on the Waker-level switch. Turning it off stops new chat-driven creation and updates, but does not delete existing Skills.
- For an uploaded Skill, open its details and enable Allow self-evolution only when the Waker may improve that package. Leave it read-only when the original content must remain fixed.
- Complete a complex task with clear inputs, steps, and an accepted result. Ordinary questions normally do not produce a reusable Skill.
- Return to this page and verify that the new or updated Skill describes the right trigger, procedure, boundaries, and completion criteria.
- Run a similar but not identical task to confirm that the Waker applies the Skill in the right situation instead of forcing it onto unrelated work.
Inspect history and roll back
For Skills that support version management:
- Open the Skill details and select History.
- Select a version and inspect its summary and file diff. Identify whether it came from creation, editing, self-evolution, or rollback.
- Choose the required historical version and roll back.
- Start a new chat and rerun a fixed task to verify the active content.
Update, replace, or uninstall a Skill
- Identify Wakers, Autonomous Work items, and WakerFlows that depend on it.
- Review changes to inputs, tools, and permission scope.
- Update one test Waker and run the fixed sample.
- Expand the update only after the result is confirmed.
- Before uninstalling, remove or replace the Skill in dependent workflows.
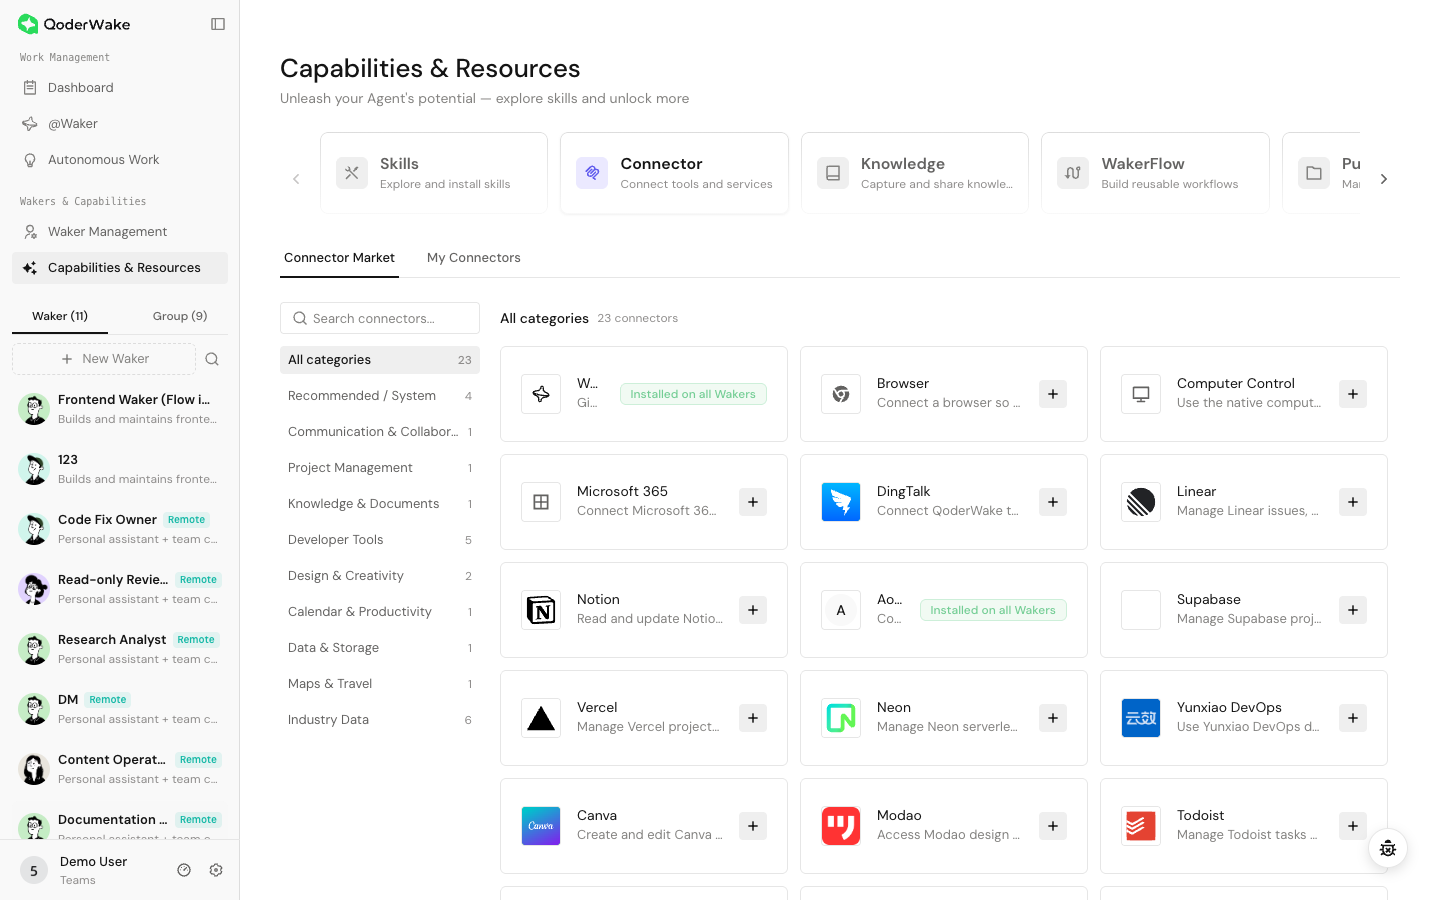
Install a connector
- Open Connectors → Connector Marketplace.
- Review supported tools, authentication, permission scope, edition, and environment requirements.
- Select install or connect, then complete OAuth, QR-code, credential, or local-command authorization as prompted.
- Confirm the connection under My Connectors. If tool switches are available, enable only the tools needed for current work.
- Add the connector under the target Waker → Connectors.
- Validate with a read-only query or test object before enabling write, send, or delete operations.
Understand connector states
| State | Meaning | Still verify |
|---|---|---|
| Installed | The connector is present in Resources | It may still need sign-in, authorization, or Waker assignment |
| Authorized | The external account or local service is authenticated | The scope is sufficient but not excessive |
| Enabled | The target Waker can see the connector | Tools are available and the test uses a new chat |
| Connected / Healthy | The connector runtime can communicate | A read-only task returns the expected result |
Configure Browser Connector
Browser Connector lets a Waker read or operate authorized browser tabs for page checks, form assistance, and web research. It does not automatically receive the entire browsing history and works only in a connected, authorized browser environment.
1. Install and assign
- Search for Browser Connector in the marketplace, open its details, and install it.
- Select the Waker that needs browser access.
- Open Browser Connector under My Connectors. The first-use view provides extension installation and connection guidance.
2. Connect and inspect tabs
- Open the web page that the Waker should use.
- Select the Browser Connector extension and connect it to the current QoderWake instance.
- Return to connector details and confirm a Connected or Healthy state and the expected available tab.
- Resolve Not authorized, Disconnected, or Version incompatible states directly; do not expand Waker permissions to bypass a connection problem.
3. Validate with a read-only task
Start a new chat and ask the Waker to read the title and summarize the structure of the currently authorized tab. Confirm it selected the intended tab before testing clicks, typing, or downloads.
Sending, submitting, deleting, purchasing, publishing, and account-setting changes are high-impact browser operations. The Waker should state the target, impact, and recovery plan, then wait for human confirmation.
Add a custom MCP connector
When the page provides manual or JSON configuration:
- Obtain the confirmed configuration format from the service provider.
- Use a trusted command, server address, and startup arguments.
- Put credentials in protected fields or environment variables, not task text or ordinary JSON.
- Restrict accessible directories, network destinations, and tool names.
- Save, check the discovered tool count, and execute one read-only call.
Assign resources to a Waker
The resource center answers “what capabilities are available”; a Waker detail page answers “what this Waker may use.”
- Open the target Waker's Skills or Connectors page.
- Select Add and choose an installed resource.
- Confirm that the resource matches the Waker's role.
- Open Permissions and verify that file, tool, and model safety rules remain limited.
- Validate in a new chat.
Credential and permission safety
- Start with read-only access, a test account, and the smallest scope.
- Keep human confirmation for external sending, deletion, publishing, payments, and production changes.
- Never put secrets, tokens, or cookies in tasks, memory, knowledge bases, role files, or screenshots.
- Compare the authorization screen with the actual tools; reject permissions that are not required.
- Before removing a connector, check dependent Wakers, Autonomous Work, and WakerFlows.
Troubleshooting
| Symptom | Check |
|---|---|
| Resource not found | Search/filter → CN or Global edition and account → version and feature flag |
| Installed but unused | Assigned Waker → new chat → role and trigger description |
| Connector not authorized | Repeat authentication → account permission → network and edition |
| Browser Connector cannot find a tab | Extension installed and enabled → current instance connected → tab authorized → connection refreshed |
| No tools discovered | Service state → configuration → authentication → network |
| Call rejected | Waker permission → connector permission → external object permission |
| Automation fails after update | Skill/connector version → changed inputs or tools → rerun the workflow |