Install QoderWake on a cloud desktop with a graphical interface or on headless Linux ECS, and open the Web UI.
This section explains how to deploy QoderWake to a cloud environment so that Wakers keep running without depending on your local computer. Cloud environments fall into two types, with different installation and access methods:
Difference
Cloud desktop (with graphical interface)
Linux ECS (headless)
How you operate it
Connect remotely to the desktop; operation is basically the same as on a local computer
Command line only, through SSH
Installation method
Run the installer or the install command on the desktop
Run the install command through SSH
Opening the Web UI
Open the local address in the browser on the cloud desktop
Open it from a local browser through the server address or SSH port forwarding
Port exposure required
No
Direct access requires TCP 19820 to be allowed
Suitable for
Keeping your local usage habits and confirming run status in a graphical interface
Command-line-only environments that need long-running unattended operation
Both environments must stay powered on and running; otherwise, tasks in progress are interrupted.
A cloud desktop is a cloud-hosted desktop environment with a graphical interface. Because it includes a desktop and a browser, QoderWake is installed, signed in to, and used exactly as on a local computer: no SSH login is required, and no extra port needs to be opened to access the Web UI.
Connect to the cloud desktop with the method provided by your cloud desktop service, enter the desktop, and then confirm the specification and the environment of the cloud desktop.Use one of the following two recommended configurations:
Configuration
Specification
Disk
Suitable for
Standard
4 vCPU, 8 GB
100 GB
Few Wakers running at the same time, and code repositories of ordinary size
Advanced
8 vCPU, 16 GB
160 GB
Multiple Wakers running at the same time, or larger code repositories and working directories
If you are not sure which one to use, start with the standard configuration. If you notice slowdowns or run out of disk space later, upgrade to the advanced configuration with the method provided by your cloud desktop service.Then confirm the following:
Item
Requirement
Operating system
Windows 10+, macOS 13.0+, or a mainstream Linux distribution with a desktop environment
Network
The cloud desktop must be able to reach the Qoder service, model services, code repositories, and the connectors you use
Account permissions
The current cloud desktop account can install programs, start background services, and access the target working directory
When the cloud desktop specification and image are assigned by the service provider, first check whether QoderWake is already preinstalled in the image. If it is, skip the installation and go straight to opening the console and signing in.
Choose one method based on the operating system of the cloud desktop. All three are completed inside the cloud desktop, with no need to transfer files from your local computer.Windows cloud desktop
In the browser on the cloud desktop, open the QoderWake website and download the Windows installer (.exe).
Double-click the installer and complete the installation as guided by the wizard.
Complete the Qoder account authorization as prompted, and wait for the service to start.
macOS cloud desktop
In the browser on the cloud desktop, open the QoderWake website, select "MacOS", and then select the "ARM64 (Apple Silicon)" or "X64 (Intel)" package according to the chip of the cloud desktop.
Download and open the .dmg, then drag QoderWake into Applications.
Open QoderWake from Applications, complete the account authorization as prompted, and wait for the service to start.
Linux cloud desktop with a graphical interfaceOpen a terminal on the cloud desktop and run:
Do not close the terminal while the command runs. When the authorization page appears, complete the authorization in the browser on the cloud desktop, then return to the terminal and wait for the installation to finish.The installer automatically detects the system platform and downloads the required components. Check the version after the installation is complete:
Copy
qoderwake --version
If you are prompted that qoderwake cannot be found, open a new terminal window; if it is still unavailable, use the full path ~/.qoderwake/bin/qoderwake.Other sign-in methods, such as switching accounts or using a token, work the same as on a local computer. See Quick Start for details.
Open the Web Console in the browser on the cloud desktop. If the browser does not open automatically, run qoderwake portal on the cloud desktop.
Confirm that the service is running on the cloud desktop:
Copy
qoderwake status
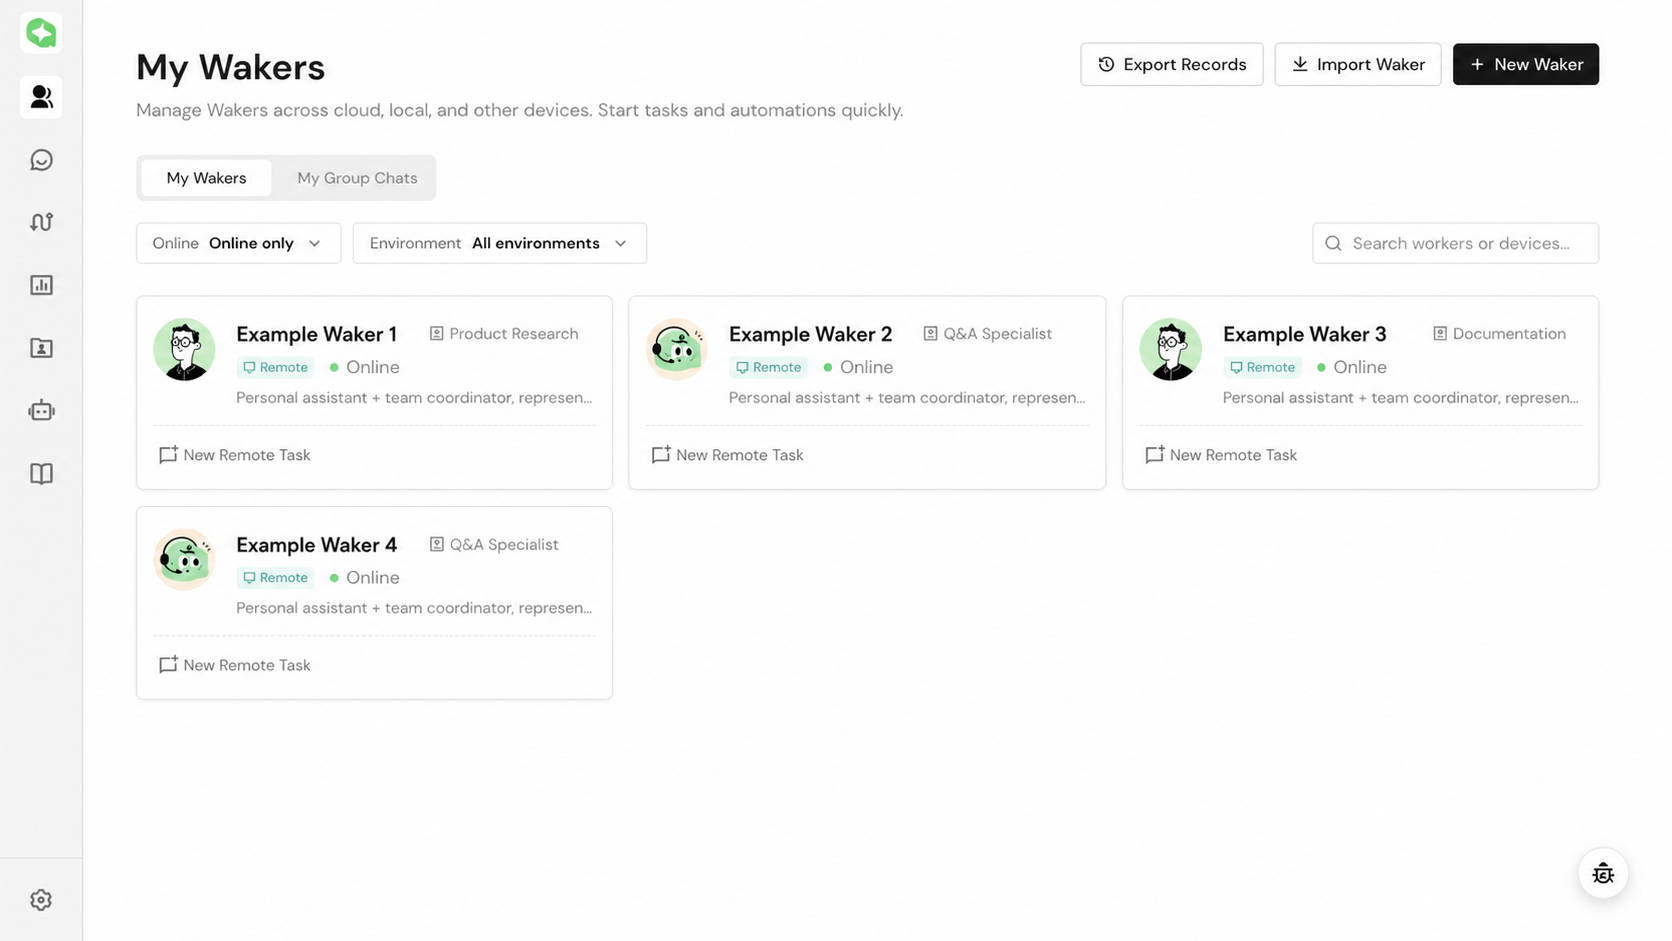
Open Waker Management, confirm that the Waker list for the current account is visible, and confirm that you can create or open a Waker. The deployment is complete.
When the Qoder authorization is required the first time you open the Web UI, see the "Complete the Qoder login" and "Enter the QoderWake console" sections on this page for the page flow and the screenshots. Both sections also apply to cloud desktops.When the Web UI is accessed on the cloud desktop itself, keep the default local-only listening address. There is no need to change the listening parameters or to allow TCP 19820 in the security group. If you also need to access the same instance from your local computer or other devices, follow one of the two access methods in the ECS section on this page and assess the network exposure the same way; in that case the instance still accepts only the same single Qoder account.
When a cloud desktop sleeps, is suspended after you disconnect, or is shut down on a schedule, chat tasks and automated tasks in progress are interrupted, and scheduled tasks miss their trigger time. After the deployment is complete, configure both layers below:
Power settings in the cloud desktop operating system: In the system power and sleep settings, set sleep, hibernation, and suspend-after-display-off to Never, so that the system keeps running while nobody is operating it.
Session and shutdown policies in the cloud desktop console: In the cloud desktop management console, disable idle disconnection, unattended timeout, and scheduled shutdown policies. If they cannot be disabled, set the timeout longer than the longest task runtime.
Disconnecting a remote session is not the same as shutting down the cloud desktop. When both layers above allow long-running operation, QoderWake keeps running tasks on the cloud desktop after you disconnect, and you can review the results the next time you connect to the desktop.
In the following content, the SSH login, the installation commands, and the two access methods apply to headless Linux ECS. The "Complete the Qoder login" and "Enter the QoderWake console" sections describe the common process after the Web UI is open, and they also apply to cloud desktops.The overall process for ECS is: SSH login and complete the installation, select an access method to open the Web UI, then complete the Qoder login and enter the console.
Difference
Method 1: Direct access through server address
Method 2: Access through SSH port forwarding
QoderWake listening address
0.0.0.0:19820, monitors all network cards of the server
127.0.0.1:19820, only monitors the server itself
Browser address
http://<server-ip>:19820/
http://127.0.0.1:19820/
Do you need SSH forwarding
No
You need to maintain an SSH forwarding connection on the local computer
Network conditions
ECS firewall or cloud security group needs to allow TCP 19820
The local computer can connect to ECS through SSH
Accessible scope
All devices that can access ECS port 19820 can open it; each device needs to log in separately and use the same Qoder account
The QoderWake port is not directly open to the outside world and is accessed through an SSH tunnel
Replace <username> and <server-ip> with the actual values. SSH can use either an account password or a configured key; credential setup is outside the scope of this guide.
Open a terminal on your local computer and use the actual username and server address to connect to ECS:
Copy
ssh <username>@<server-ip>
If you use password authentication, please enter the Linux account password as prompted; if a key has been configured, SSH may directly complete the authentication. After successful login, the command prompt switches to the user and hostname on ECS.
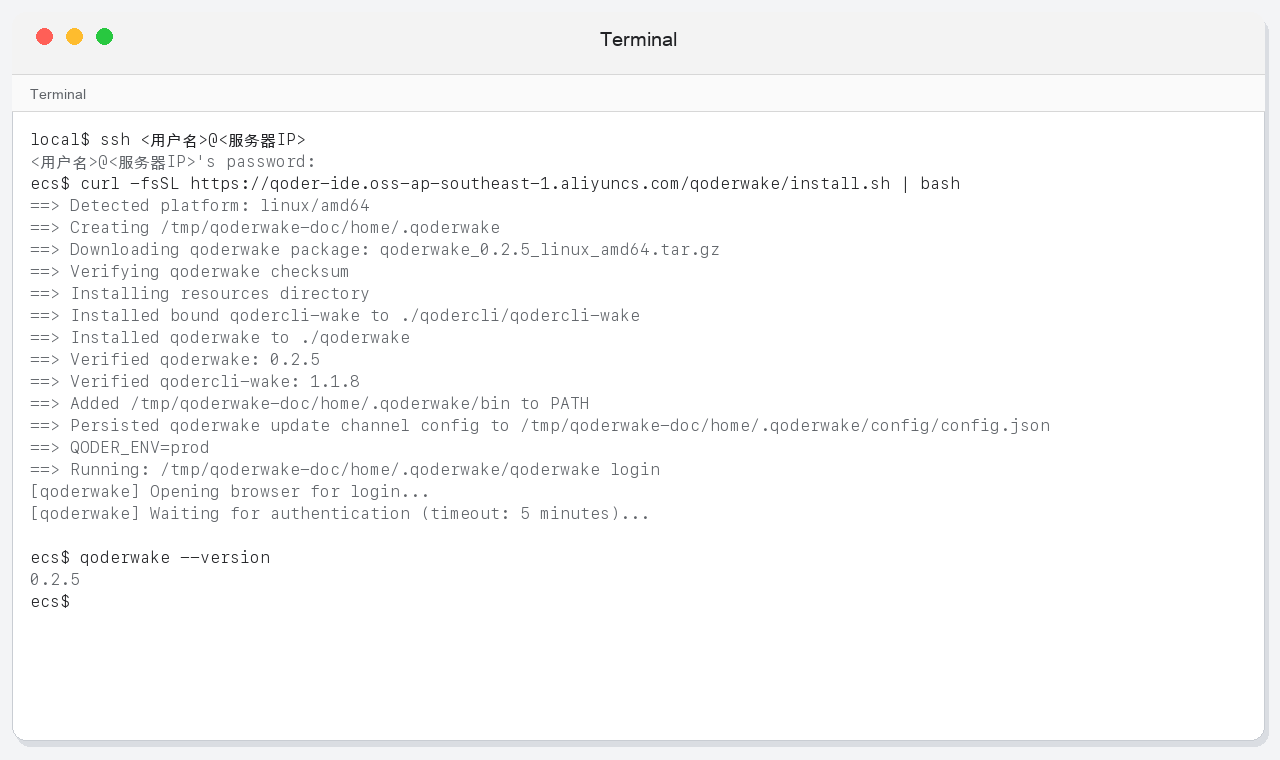
The installer automatically detects the system platform and downloads the required components. Check the version after the installation is complete; the Qoder account completes the login after opening the Web UI. There is no need to perform account login on ECS first.
Copy
qoderwake --version
If you are prompted that QoderWake cannot be found, please exit and re-establish the SSH connection, or refresh the current shell environment as prompted by the installer. After confirming that the version is normal, choose one of the following two access methods to continue.macOS Terminal Example 1: SSH login, installation and version checkThe following examples show the SSH login, QoderWake installation, and version checking process.
This way QoderWake listens for 0.0.0.0:19820. Devices on the network that can access ECS port 19820 can directly open the Web UI through the server address without establishing SSH forwarding.
First stop the current QoderWake process. If the process is not running yet, a not-running prompt will not affect subsequent startups:
Copy
qoderwake stop
Then let QoderWake monitor all network cards of the server. After the command is executed, you will be prompted about network exposure risks. Please enter yes as prompted and press Enter to continue:
Copy
qoderwake start --host 0.0.0.0 --port 19820
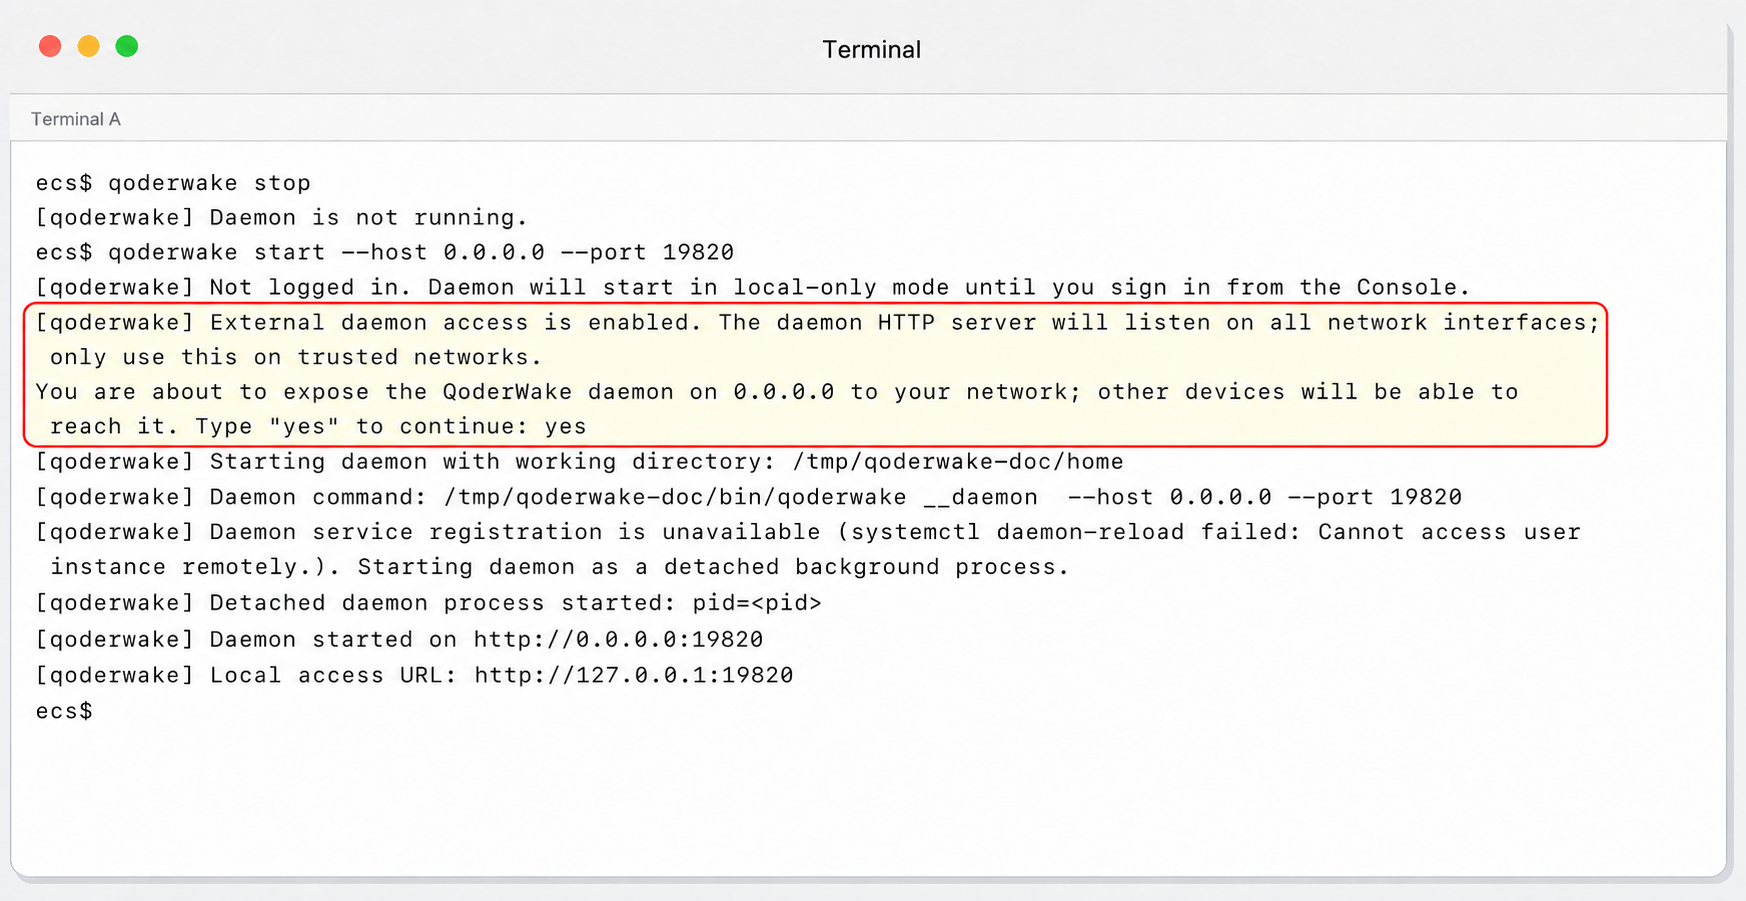
Entering yes confirms that QoderWake will listen on every network interface. Any device allowed through the security group, firewall, and network path can reach port 19820. Restrict inbound access to trusted source IPs or networks. If you cannot verify the network boundary, use SSH port forwarding instead.This method supports access from multiple devices, but each device must sign in through its own browser and use the same Qoder account associated with the QoderWake instance. Entering yes does not open a security group or firewall, and it does not configure HTTPS or an IP allowlist.macOS Terminal Example 2: Direct access via server addressThe following example shows the complete process of stopping QoderWake, starting direct access mode, and entering yes to confirm network exposure risk.
The red box highlights the network-exposure warning and the yes confirmation.
ECS security groups, server firewalls, and other upstream network policies need to allow TCP 19820 inbound access.
This method will expose the QoderWake Web UI to devices that can access this port. Please only use it in a trusted network and set access control based on the actual environment.
Open a browser on another machine that can access the ECS and visit:
Copy
http://<server-ip>:19820/
This method does not require maintaining an additional SSH forwarding connection. After the page is opened, you can directly log in to Qoder without performing subsequent SSH forwarding operations.
Method 1 allows multiple computers or servers to access QoderWake through the same ECS address, but browser sign-in state is independent on each device and is not shared automatically.
Each device must complete Qoder sign-in in its own browser the first time it opens the QoderWake Web UI.
Every device must use the same Qoder account associated with the QoderWake instance.
Authentication with another account fails, so that account cannot enter the instance console.
This method allows QoderWake to only listen to the 127.0.0.1:19820 of the ECS machine, and then forward the port to the local computer through SSH. The QoderWake port will not be opened directly to the outside world, nor does it need to open TCP 19820 in the security group.
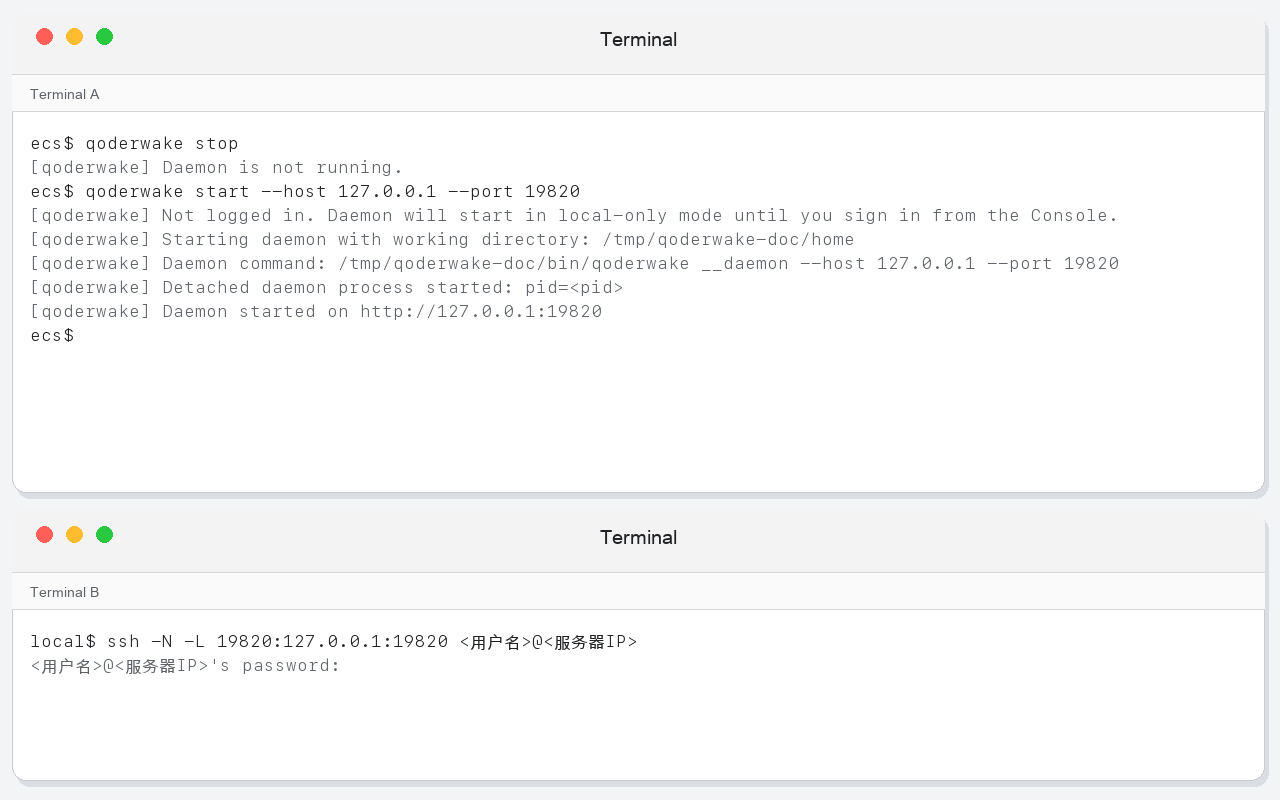
SSH may prompt for the account password, or it may directly use the configured key. Usually the output will not continue after the forwarding is established; please keep the terminal running and press Ctrl+C to end the forwarding.macOS Terminal Example 3: Access via SSH port forwardingTerminal A starts QoderWake on ECS, and Terminal B establishes SSH forwarding on the local computer; after the forwarding is established, Terminal B keeps running and usually no longer outputs.
After opening the QoderWake Web UI through any access method, even if the current browser has not logged in to Qoder, you can continue according to the following process:
Click "Login" on the QoderWake page. The original page will display "Waiting to log in" and a new Qoder page will be opened at the same time.
If the new page displays the Qoder login page, complete the account login first; if the browser has already logged in to Qoder, you can directly enter the account confirmation page.
Confirm the account on the "Continue to use this account?" page and click "Continue", then return to the original QoderWake page and wait for successful login.
Instructions for first-time binding: If the QoderWake instance has not been associated with a Qoder account, the account successfully authorized for the first time will become the daemon owner (instance master account); if the instance has been associated with an account, subsequent access must use the same Qoder account, and authorization cannot be completed using other accounts.During the login process, the local browser needs to be able to access https://qoder.cn, and the ECS also needs to have outbound network capabilities to access the Qoder service. If no new page appears after clicking "Login", please allow the current site to open a pop-up window and try again; do not close the original QoderWake page before completing the authorization.
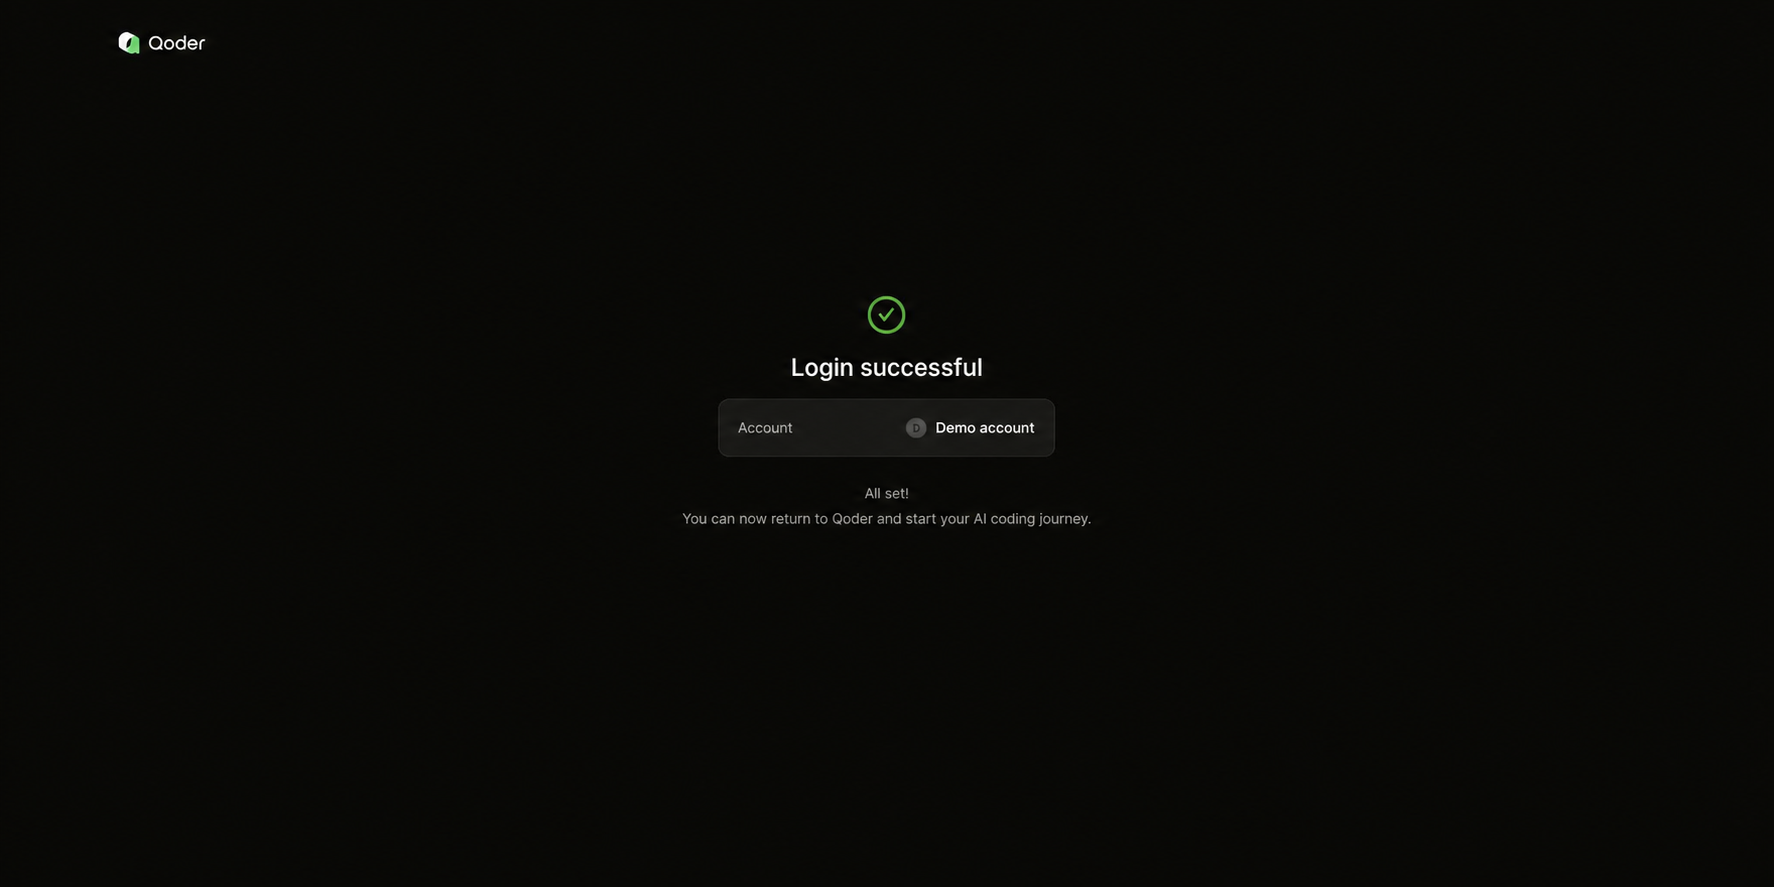
After successfully logging in, follow the page prompts to enter the workspace. When the following content appears, the QoderWake Web UI is ready for normal use:
The page can load normally;
Able to open Waker Management and see the current account's Waker list;