

Qoder CN (formerly Lingma) Enterprise Edition offers user management, authorization management, and enterprise customization. It enables enterprise administrators to centrally manage Qoder CN access for developers and helps organizations adopt intelligent development at scale.
Qoder CN Enterprise Edition provides two editions:
This topic describes how to get started with the Enterprise Dedicated Edition.
Perform the following steps as an Alibaba Cloud primary account or an authorized RAM user:
After you create an Enterprise Dedicated Edition instance, a default enterprise administrator account is provided. You can use this account to access the enterprise management backend and perform the following actions:
After creating users, you can assign them Qoder CN licenses. If a user belongs to multiple organizations, you only need to assign one site-level license (consuming one license seat). When logging in, they can select their developer identity for a specific organization.
For details about license assignment, see License management.
Enterprise management supports multiple organizations. You can create multiple organizations to isolate usage permissions and statistical data. When creating an organization, you can select the range of users to synchronize.
For details about organization management, see Organization management.

After you create an organization, the selected users are automatically synchronized. Then, go to the organization to manage developer identities within it as follows:


Click your account information at the top of the Qoder CN intelligent chat window, and then click Log out.
- Qoder CN (formerly Lingma) Enterprise Standard Edition: Provides out-of-the-box enterprise management, including unified account and authorization management, statistical reports, and audit logs. It meets the needs of enterprises for rapid rollout and centralized authorization management.
- Qoder CN (formerly Lingma) Enterprise Dedicated Edition: Provides user management with support for user account integration, unified authorization management, enterprise knowledge base Q&A, and enhanced enterprise codebase generation. It also offers a VPC deployment mode to meet enterprise security compliance and customized usage scenarios.
- This topic applies to the legacy Qoder CN Enterprise Dedicated Edition. This edition is no longer being developed. This topic is provided as a reference for existing customers only and is not updated.
For the latest features, refer to the latest Qoder CN product documentation. - Qoder CN enterprise management capabilities are based on the Alibaba Cloud DevOps enterprise management service. To create an enterprise, go to the Qoder CN console.
- For private deployment, submit an enterprise consultation. We will contact you as soon as we receive your request, so please keep your phone available.
Step 1: Create an enterprise and purchase Qoder CN (formerly Lingma)
Perform the following steps as an Alibaba Cloud primary account or an authorized RAM user:
- Log on to the Alibaba Cloud console and go to the Qoder CN console.
- In the left-side navigation pane, click Instance Management. In the Instance Management - Dedicated Instance Management section, click Create Enterprise.
Step 2: Manage enterprise users and departments
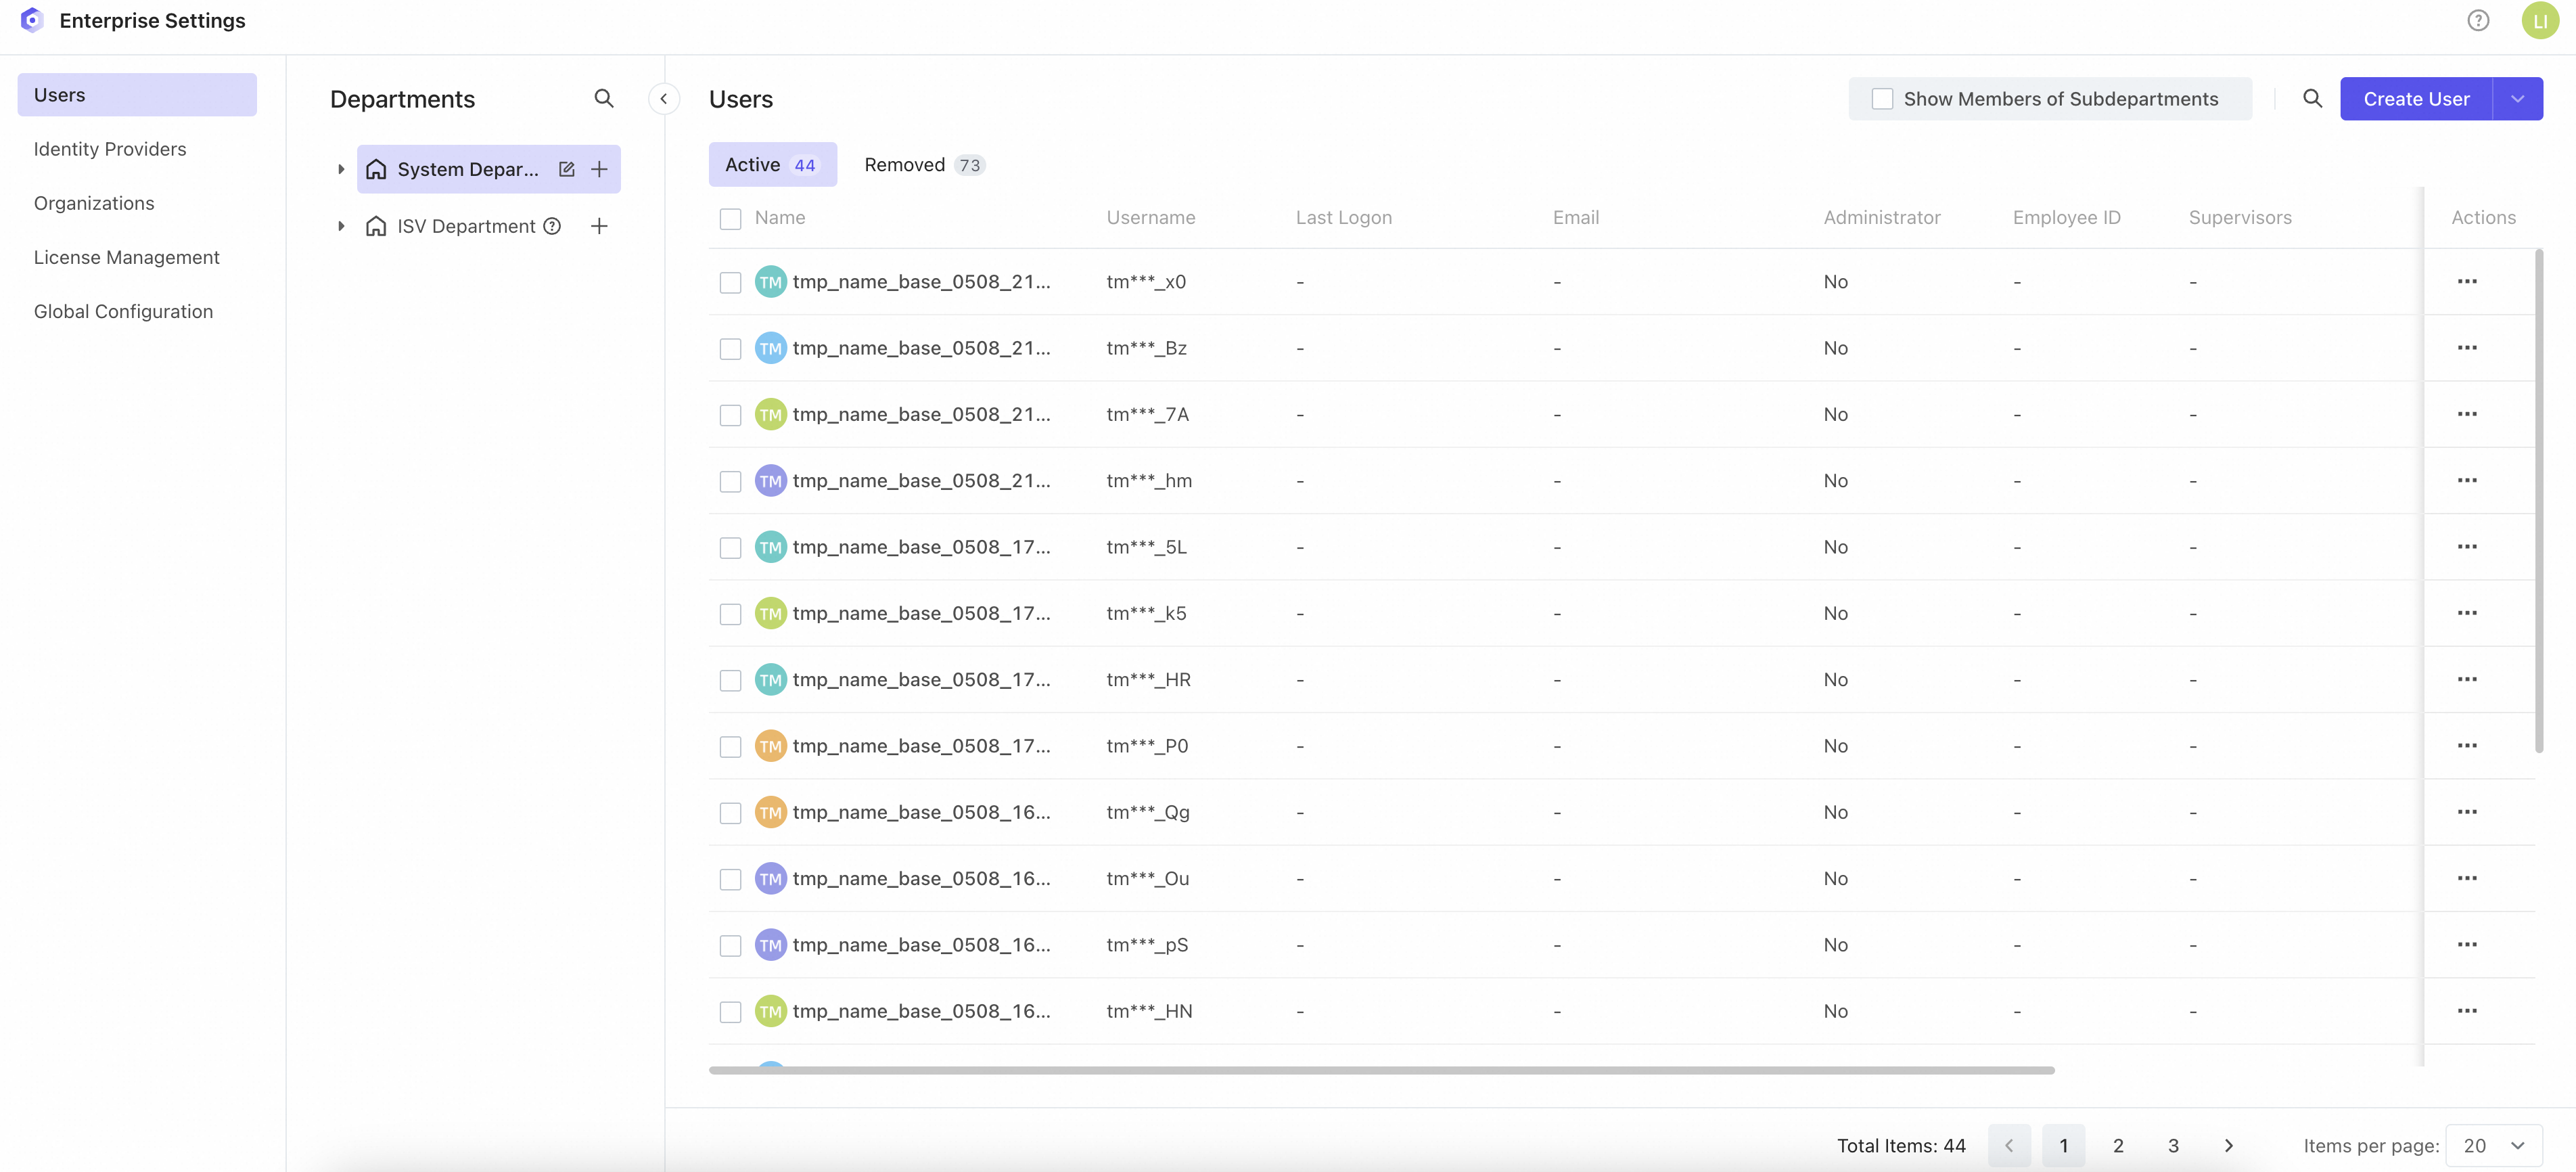
After you create an Enterprise Dedicated Edition instance, a default enterprise administrator account is provided. You can use this account to access the enterprise management backend and perform the following actions:
- Manage users, organizations, and licenses.
- Manage information for all organizations within the enterprise instance.
- Configure third-party identity provider integration (for example, integration with your company's user system).
Step 3: Assign licenses in enterprise management
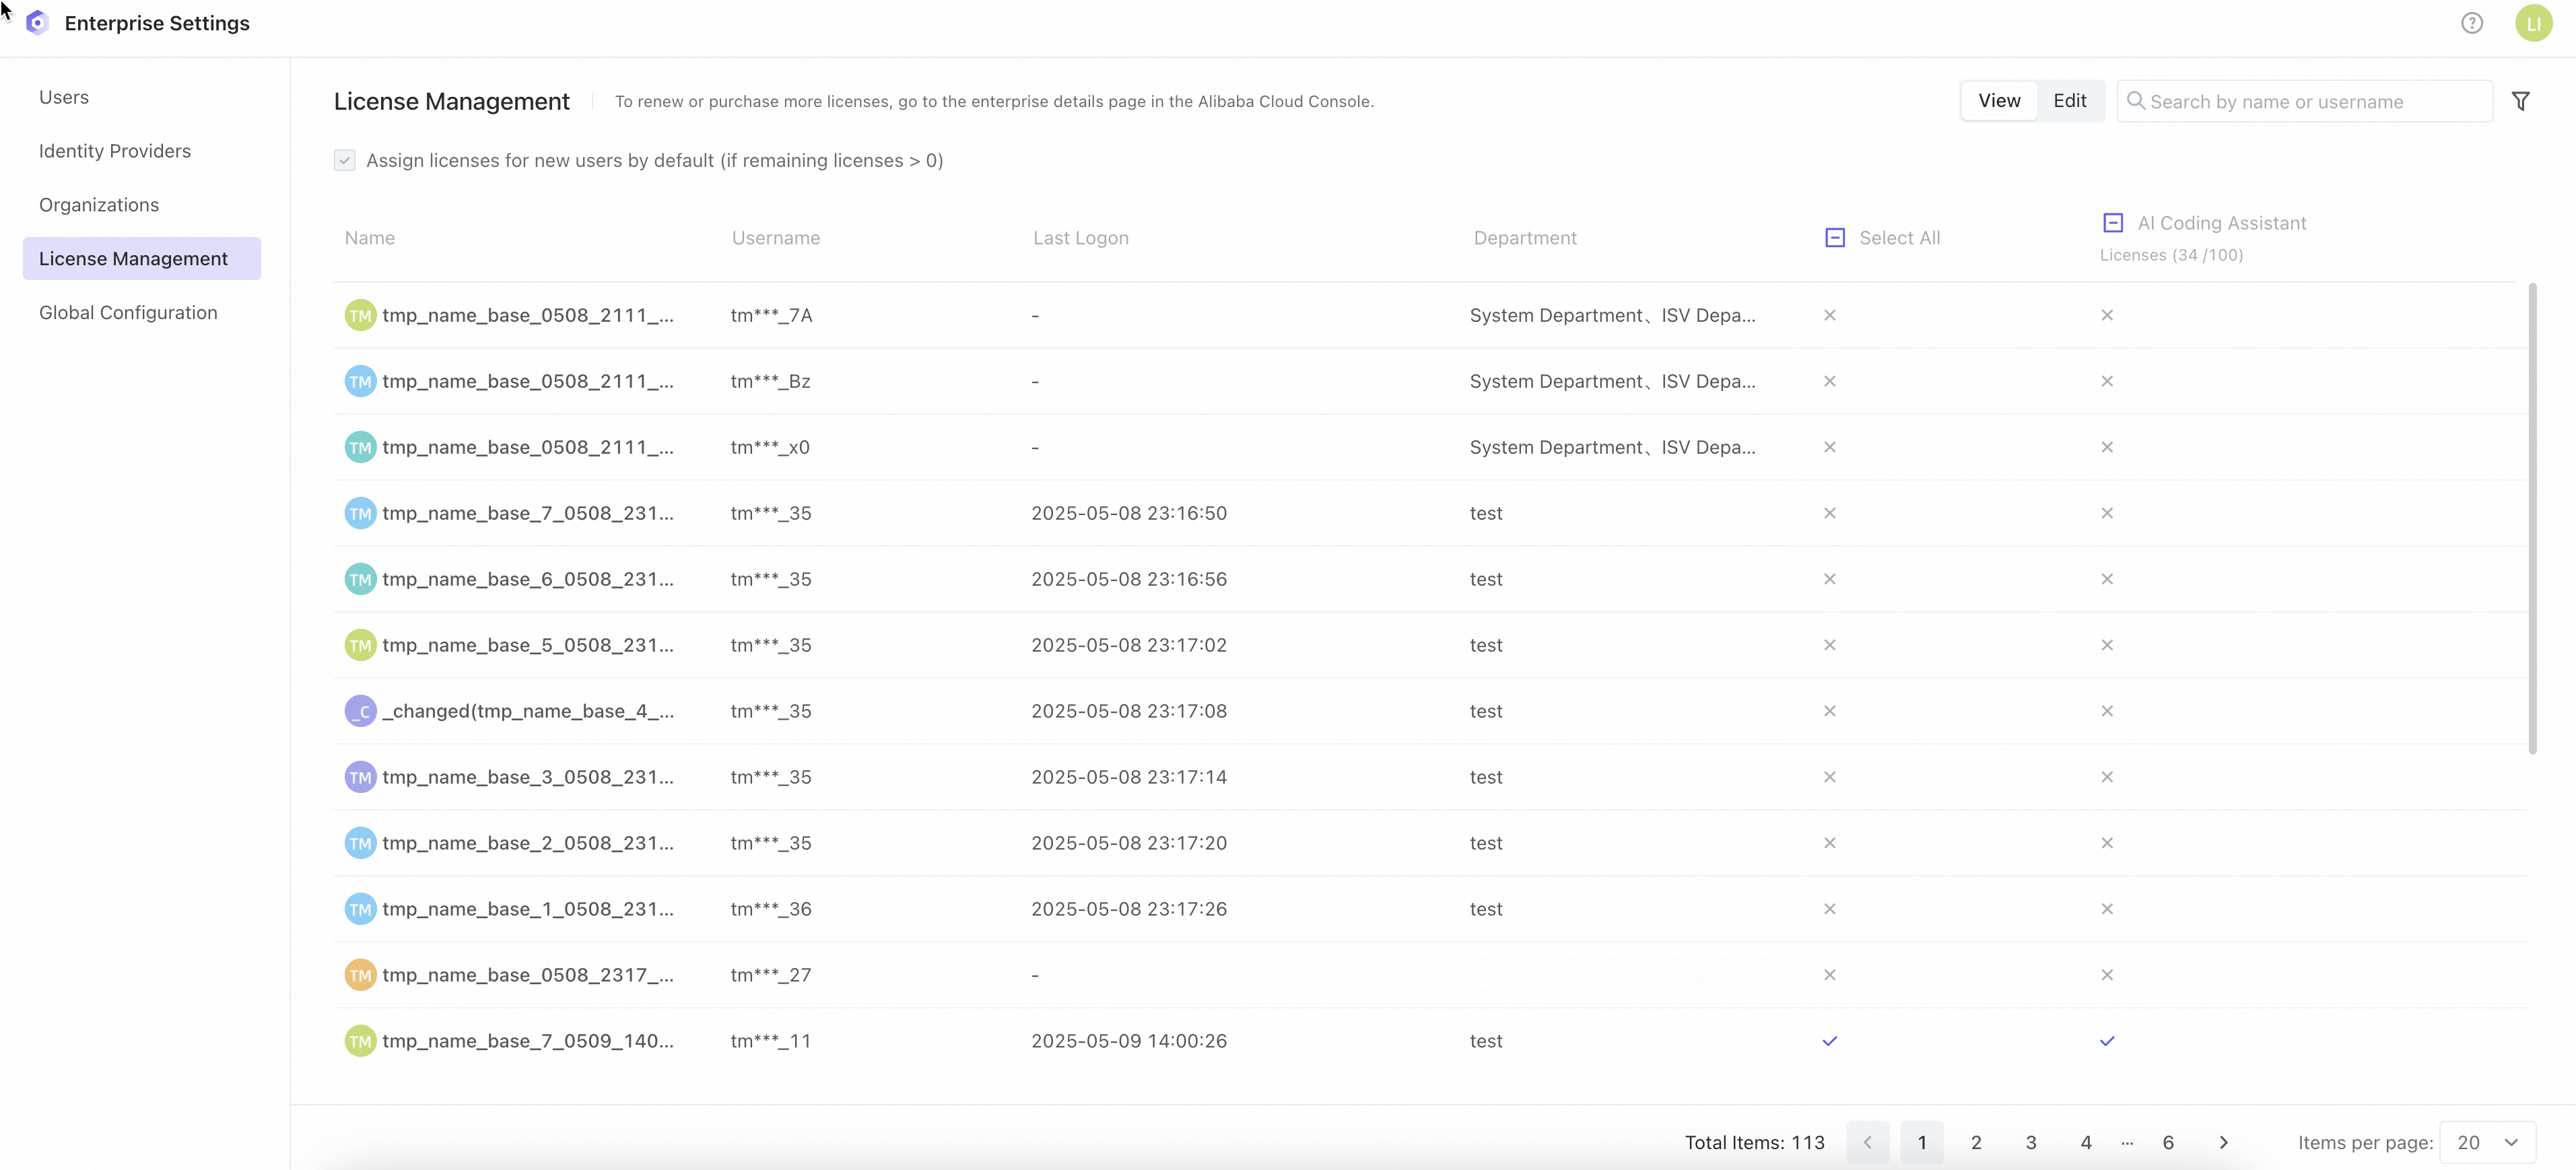
After creating users, you can assign them Qoder CN licenses. If a user belongs to multiple organizations, you only need to assign one site-level license (consuming one license seat). When logging in, they can select their developer identity for a specific organization.
For details about license assignment, see License management.
Step 4: Create an organization and synchronize enterprise users into it
Enterprise management supports multiple organizations. You can create multiple organizations to isolate usage permissions and statistical data. When creating an organization, you can select the range of users to synchronize.
For details about organization management, see Organization management.
Step 5: Grant developer identities within an organization
After you create an organization, the selected users are automatically synchronized. Then, go to the organization to manage developer identities within it as follows:
- In Enterprise Management - Organization Management, click an organization's name in the organization list to enter the Qoder CN console.
- In the left-side navigation pane of the Qoder CN console, click Authorization Management, and then click Add Developer to grant developers usage permissions within the organization. For details, see Authorization management. To automatically synchronize users from enterprise management, enable automatic synchronization.
Step 6: Developers in the organization log in and use Qoder CN (formerly Lingma)
- Developers in the organization download the Qoder CN IDE plugin from their IDE plugin marketplace, or download the Qoder CN IDE directly, and update it to the latest version. For details, see Installation guide.
- Configure the dedicated domain address required for developers to log in to the Enterprise Dedicated Edition.
- Click the login button in the Qoder CN intelligent Q&A window to enter the Qoder CN login page. If the enterprise has configured its own SSO login system, you are automatically redirected to that login page.
- If the current logged-in user has permission, the login success page appears. You can then go to the IDE and start using Qoder CN.