

Qoder CN offers two ways to use it. You can download the ready-to-use Qoder CN IDE, or install the Qoder CN plugin directly in your existing development tools. After installation, log in to your account to get started.
Qoder CN IDE fully integrates the capabilities of the intelligent coding assistant. It is easier to use out of the box, allowing you to enjoy an efficient and intelligent programming experience without installing any plugins.
The two versions are functionally identical (including Repo Wiki and other features). If you do not have an administrator password on your work computer, or if only you use the machine, we recommend the User version.
The following steps apply to installing Qoder CN in JetBrains IDEs on macOS, Windows, or Linux.
Tips: The following uses installing Qoder CN in IntelliJ IDEA as an example.


The following steps apply to installing Qoder CN in Visual Studio Code on macOS, Windows, or Linux.
To provide users with a high-quality product experience, we have fully upgraded Qoder CN IDE with enhanced context engineering and seamless agent integration, enabling comprehensive codebase understanding and easy handling of complex tasks. Meanwhile, product feature iterations will primarily focus on Qoder CN IDE and the Qoder CN JetBrains plugin. The update cadence for the VS Code extension will slow down. If you encounter issues or inconvenience while using the VS Code extension, we recommend switching to Qoder CN IDE, where we will provide more stable technical support.
Qoder CN IDE client
Qoder CN IDE fully integrates the capabilities of the intelligent coding assistant. It is easier to use out of the box, allowing you to enjoy an efficient and intelligent programming experience without installing any plugins.
- Supported operating systems: Windows 10/11 (x64), macOS 11.0, Linux x64 (.deb/.rpm), or later versions.
- Download URL: https://qoder.cn/download.
| Version | Installation directory | Permission requirements | Scope |
|---|---|---|---|
| User version | Current user directory (such as C:\Users\username\AppData\Local) | No administrator privileges required | Applies only to the current user |
| System version | System public directory (such as C:\Program Files) | Administrator privileges required | Applies to all users |
JetBrains IDEs plugin
The following steps apply to installing Qoder CN in JetBrains IDEs on macOS, Windows, or Linux.
Step 1: Preparations
- Operating system: Windows 7 or later, macOS, or Linux.
- Download and install a compatible JetBrains IDE, version 2020.3 or later. Qoder CN is compatible with the following IDEs:
- IntelliJ IDEA (Ultimate, Community, and Educational editions)
- Android Studio
- CLion
- GoLand
- PhpStorm
- PyCharm (Professional, Community, and Educational editions)
- Rider
- RubyMine
- RustRover
- WebStorm
- ...
Step 2: Install Qoder CN in JetBrains IDEs
Tips: The following uses installing Qoder CN in IntelliJ IDEA as an example.
Here is a JetBrains IDE theme worth sharing: the New UI of JetBrains IDEs. To use this theme, upgrade IntelliJ IDEA to the latest version. After opening the settings, you can find the New UI configuration entry under Appearance & Behavior.
Method 1: Install from the plugin marketplace
- Open the IntelliJ IDEA settings window. In the plugin marketplace, search for Qoder CN, find it, and click Install.
- After the installation is complete, restart IntelliJ IDEA.
Method 2: Install from a local file
- Click the following link to download the ZIP installation package for JetBrains IDEs: ⇩ Qoder CN - JetBrains
- After downloading the installation package, open IntelliJ IDEA and go to settings. In the settings drop-down menu of the plugin management page, click Install Plugin from Disk, select the downloaded ZIP file, and install it.
- After the installation is complete, restart IntelliJ IDEA.
Step 3: Log in and start your intelligent coding journey
- After restarting IntelliJ IDEA, click Qoder CN in the side navigation bar, and click the Log in button in the Qoder CN assistant window.

- After you click Log in, you are redirected to the login page. After logging in, you can enter the IDE client and start using it. For more information about login operations, see Installation and login.
VS Code extension
The following steps apply to installing Qoder CN in Visual Studio Code on macOS, Windows, or Linux.
Step 1: Preparations
- Operating system: Windows 7 or later, macOS, or Linux.
- Download and install Visual Studio Code version 1.68.0 or later.
Step 2: Install Qoder CN in Visual Studio Code
Method 1: Install from the extension marketplace
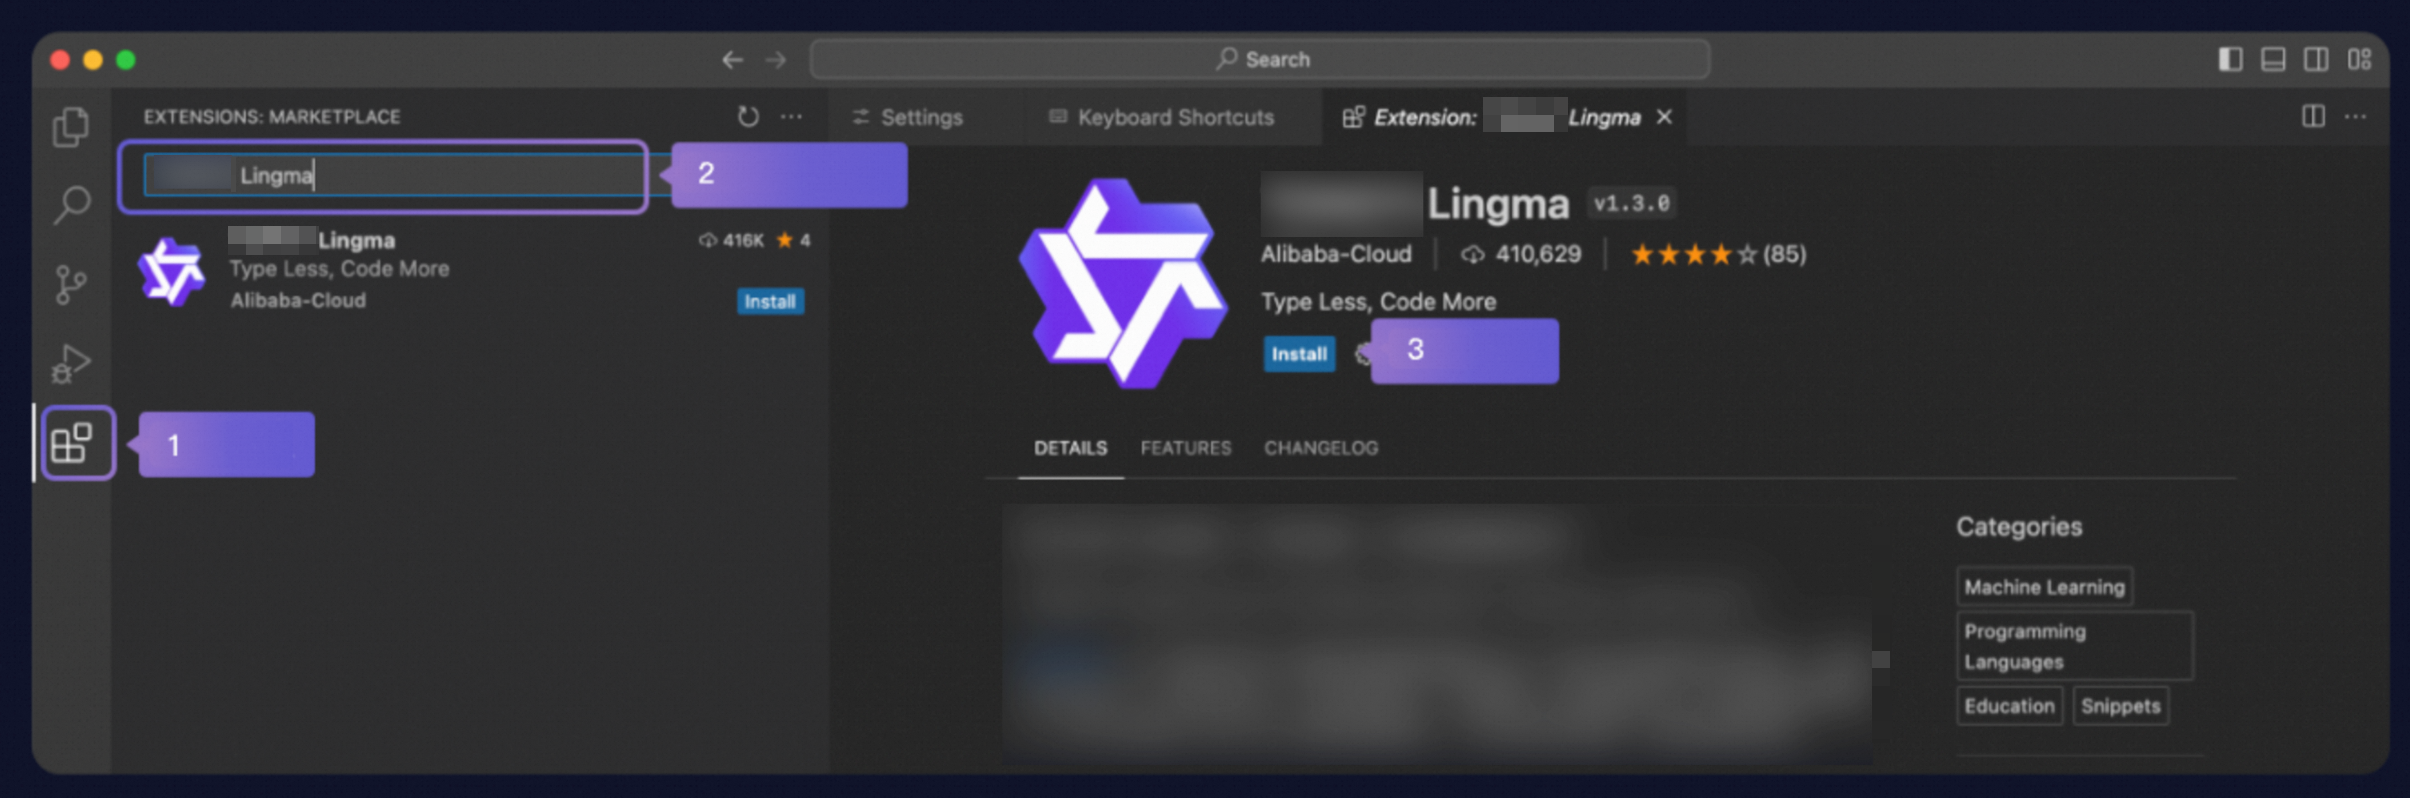
- Open the Visual Studio Code extensions view. Search for Qoder CN, find it, and click Install.
- After the installation is complete, restart Visual Studio Code.

Method 2: Install from a local file
- Click the following link to download the VSIX installation package for Visual Studio Code: ⇩ Qoder CN-VS Code
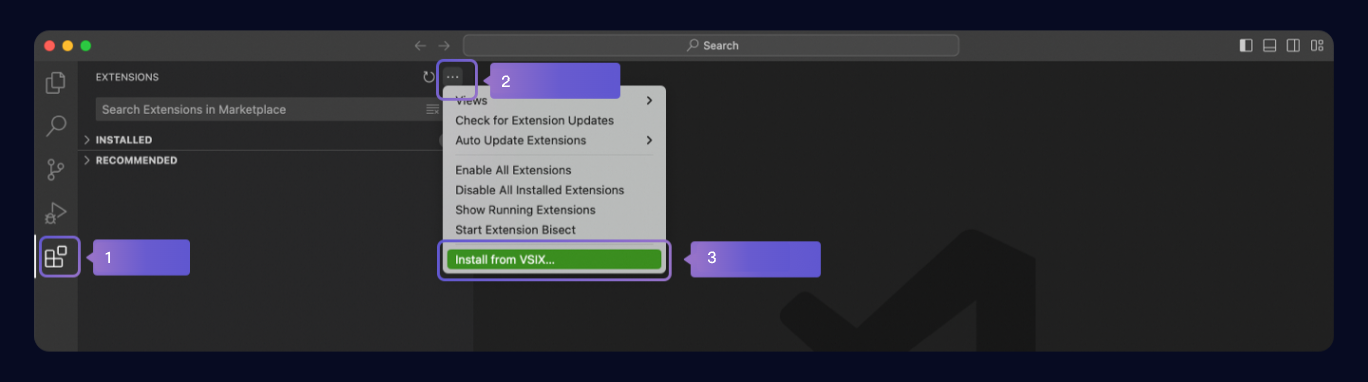
- After downloading the installation package, open Visual Studio Code. Click Extensions, click the More button, and click Install from VSIX in the drop-down menu. Select the downloaded VSIX file and install it.
- After the installation is complete, restart Visual Studio Code.
Step 3: Log in and start your intelligent coding journey
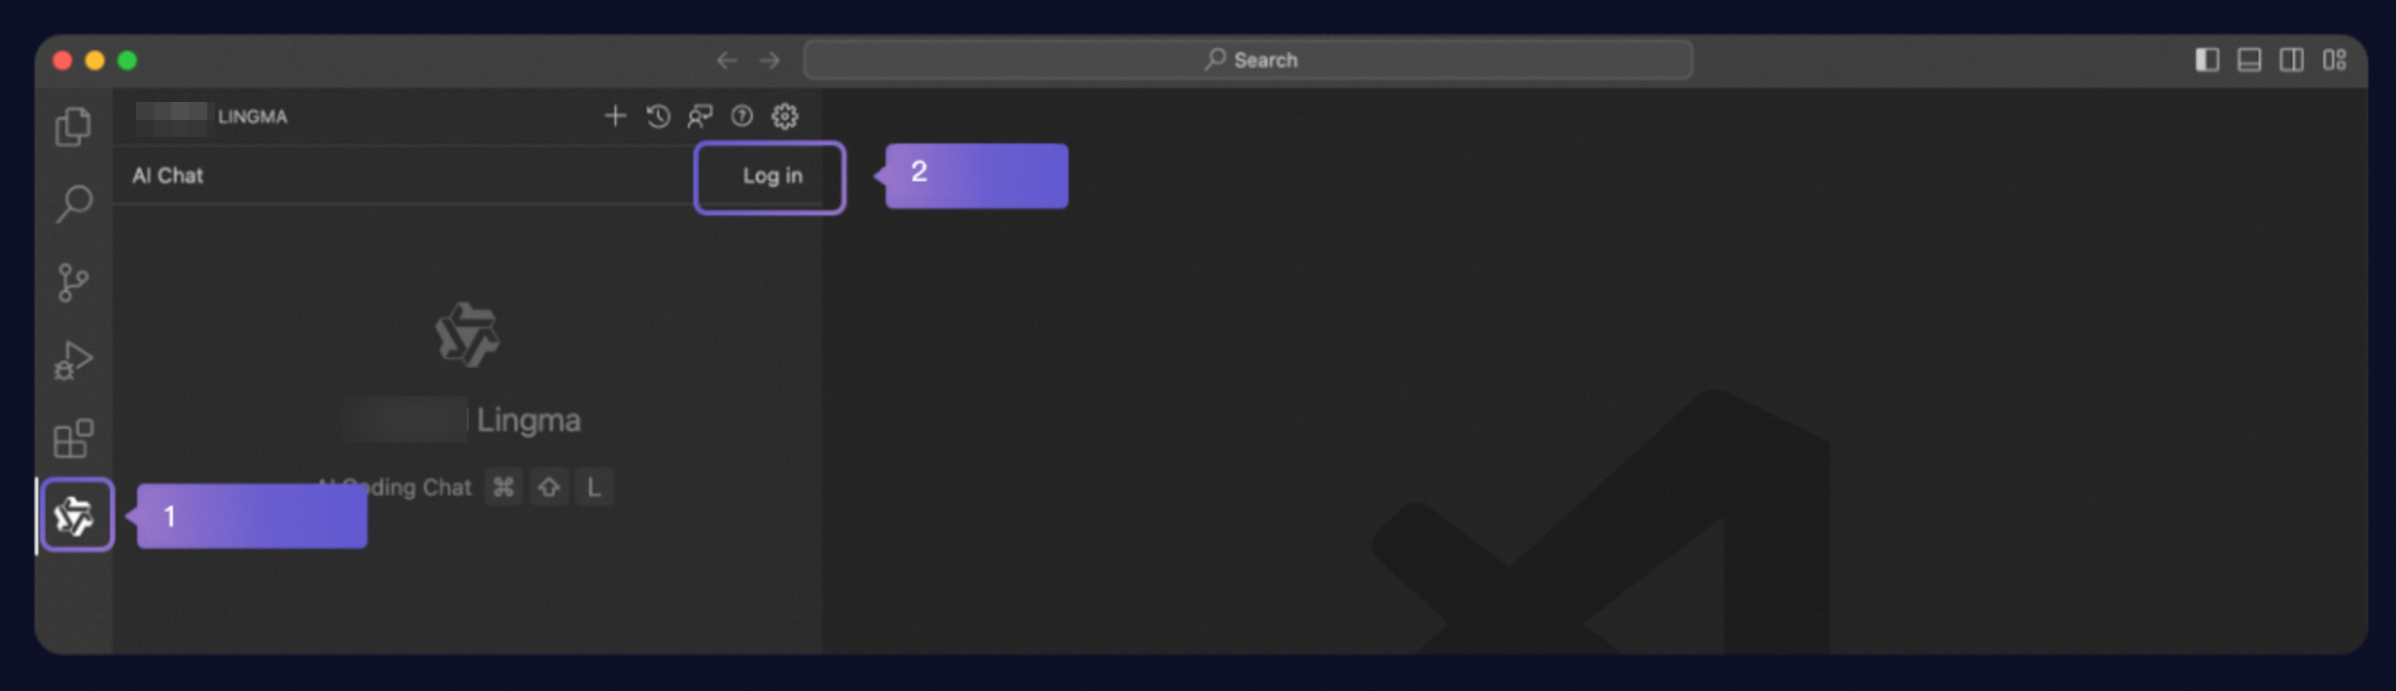
- After restarting Visual Studio Code, click Qoder CN in the side navigation bar, and click the Log in button in the Qoder CN assistant window.
- After you click Log in, you are redirected to the login page. After logging in, you can enter the IDE client and start using it. For more information about login operations, see Installation and login.