

QoderWork EN is a desktop application that runs locally. It's less like a chatbot and more like an AI teammate that actually gets work done. This guide walks you through the entire process: downloading and installing the application, signing in to your account, getting familiar with the interface, and submitting your first task.
By the end of this page, you will have installed QoderWork EN on your computer, signed in to your account, and started your first local task.
Open the QoderWork CN download page in your browser and click the macOS or Windows button to download the installer.
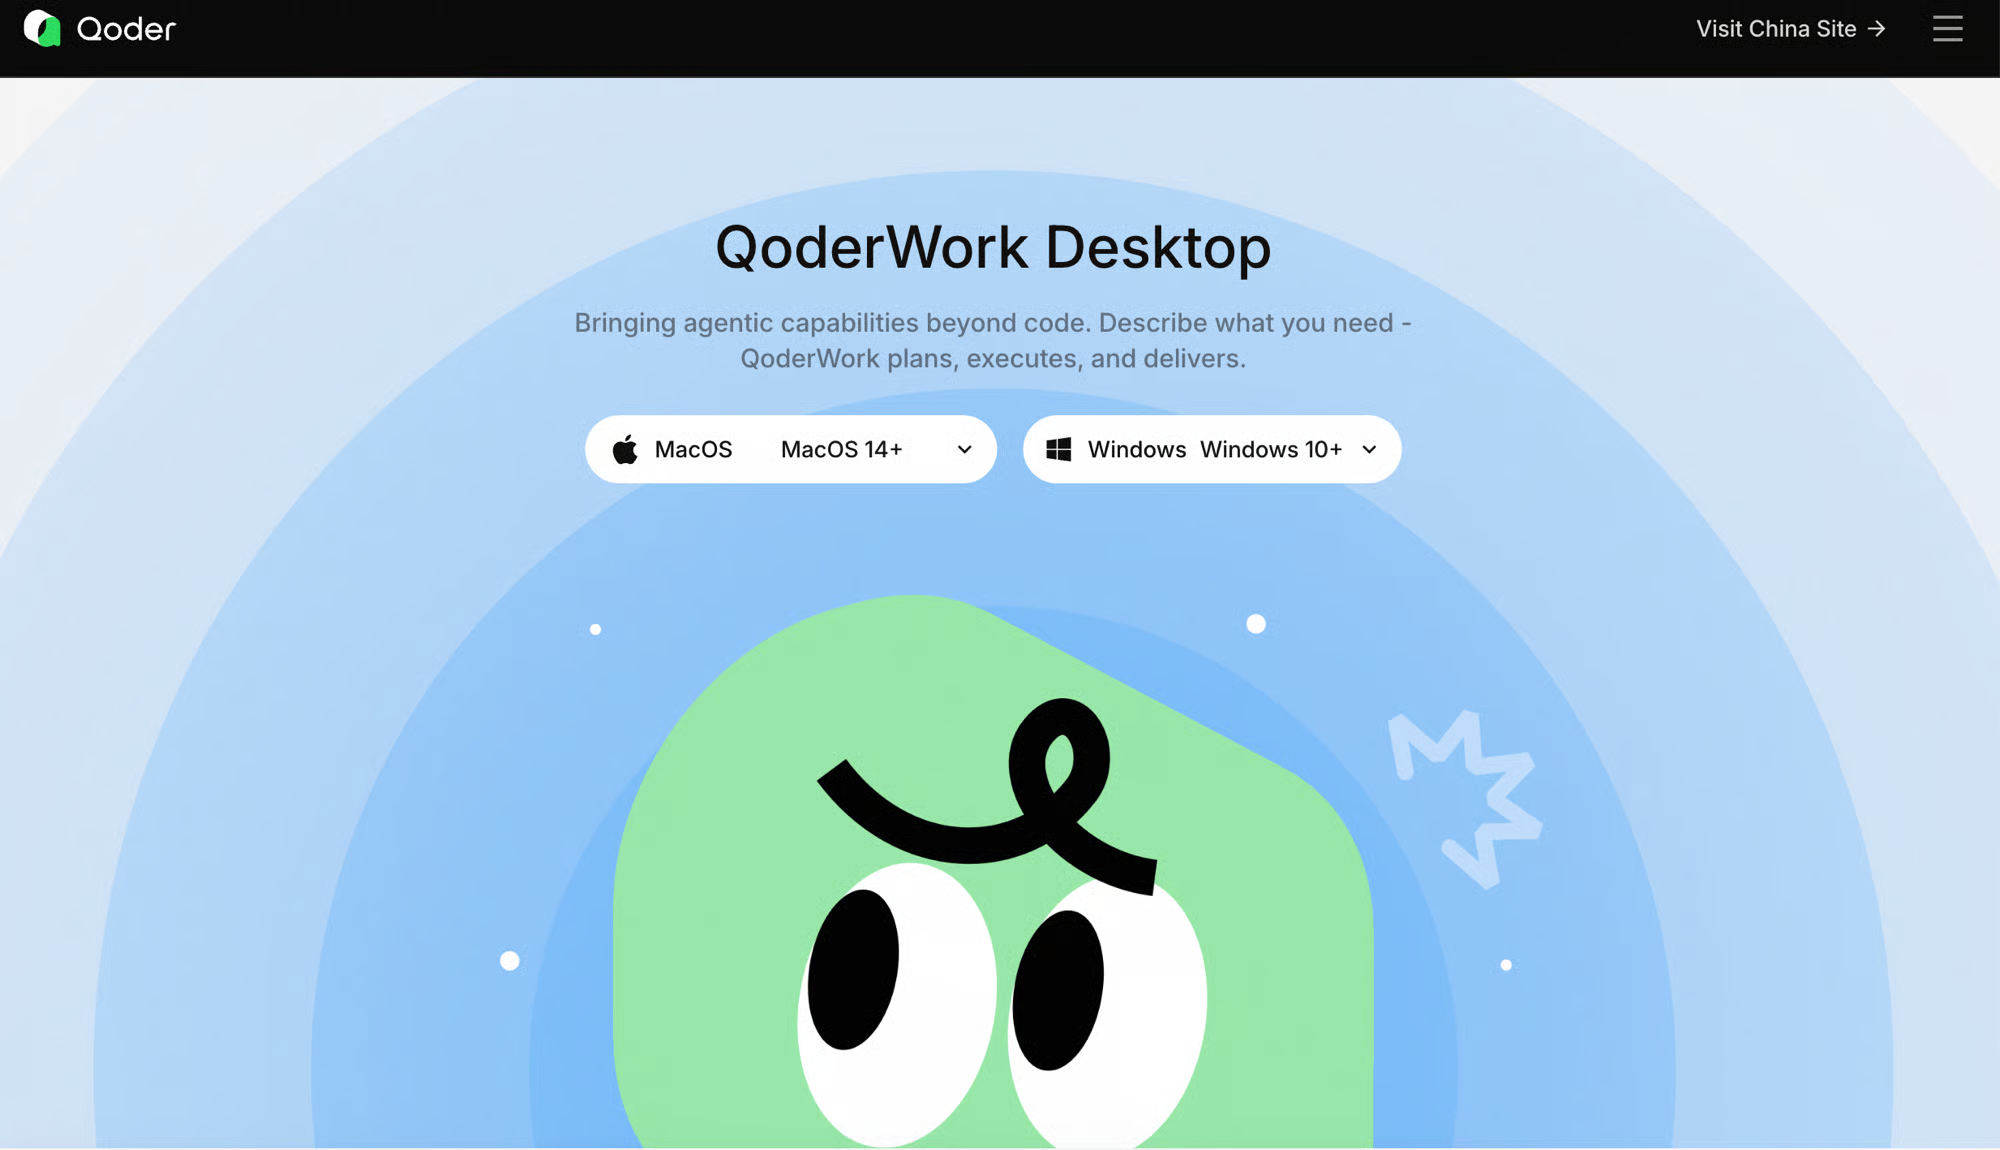 The following platforms are currently supported:
After downloading, double-click the
Windows offers two types of installers. They are functionally identical, differing only in installation scope and required permissions:
System version: Choose this version for personal computers where you have administrator privileges, or for machines where multiple users need to share one QoderWork EN installation.
User version: Choose this version for computers where you lack administrator privileges or for corporate-managed machines.
When in doubt, choose the User version. It's the easiest to install because it doesn't require administrator privileges.
If a SmartScreen prompt appears stating the publisher is unrecognized, click More info → Run anyway to continue.
When you launch QoderWork EN for the first time, a welcome screen prompts you to sign in. The left side of the screen contains the Sign In / Sign Up button, a language switcher, and a Network Settings link for proxy configuration. The right side displays the product slogan.
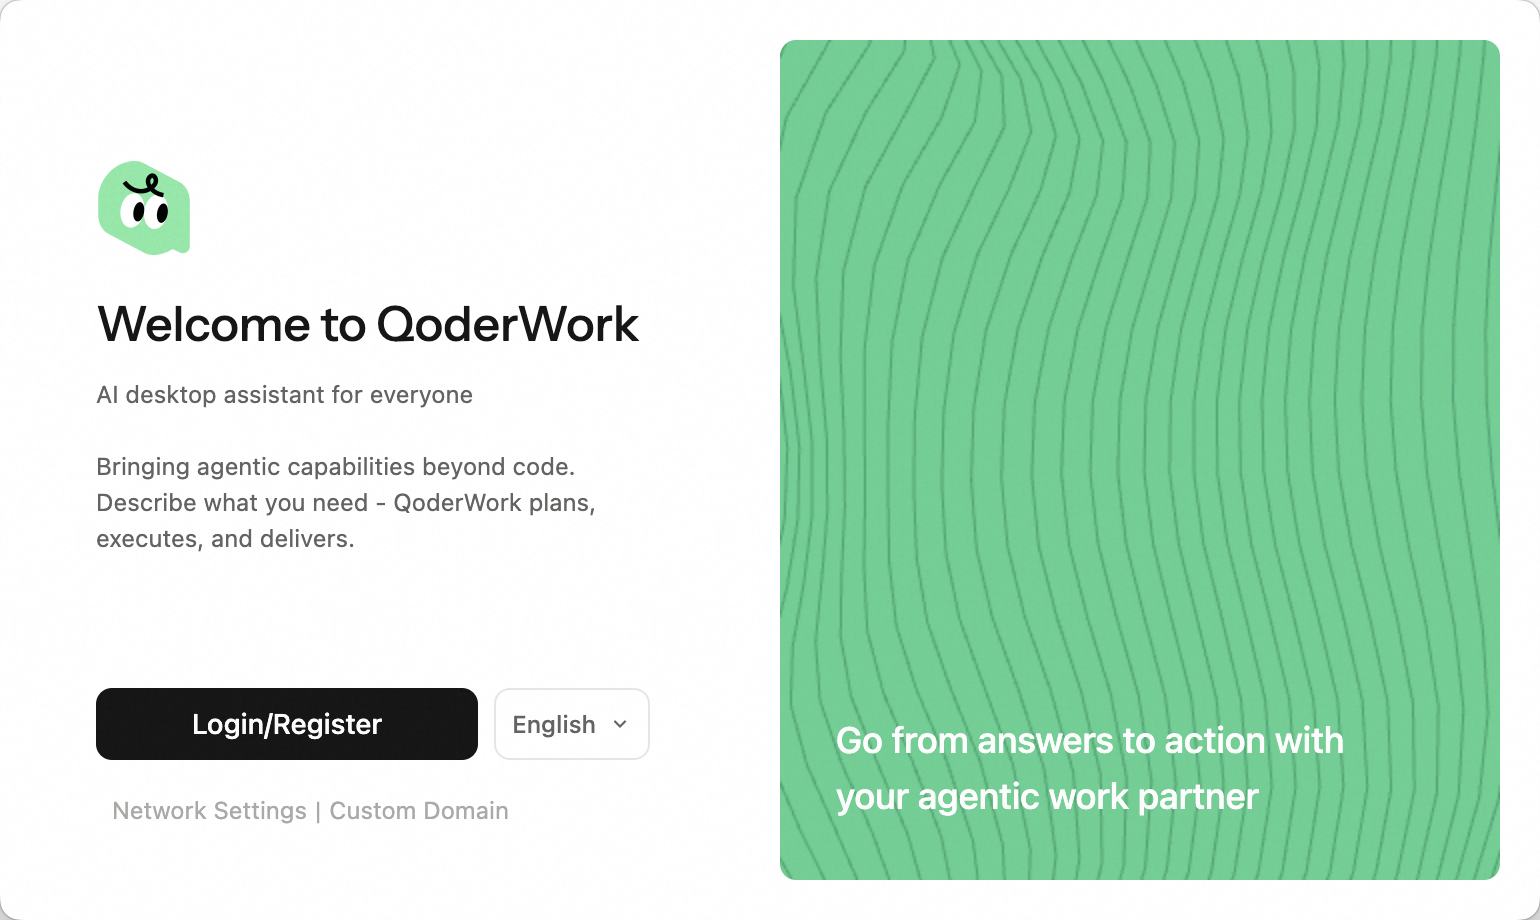 Click Sign In / Sign Up to complete authentication in your browser. You will then be redirected to the QoderWork EN main interface. If you are already signed in, the app skips this step and automatically restores your local task history.
QoderWork EN uses the same account system as other Qoder products, like the Qoder desktop client and Qoder CLI. Therefore, your Credits balance and membership benefits are shared across all products.
Click Sign In / Sign Up to complete authentication in your browser. You will then be redirected to the QoderWork EN main interface. If you are already signed in, the app skips this step and automatically restores your local task history.
QoderWork EN uses the same account system as other Qoder products, like the Qoder desktop client and Qoder CLI. Therefore, your Credits balance and membership benefits are shared across all products.
The main QoderWork EN window is divided into two parts: a vertical navigation sidebar on the left and the workspace on the right, which houses conversations, the Task Monitor, and artifacts.
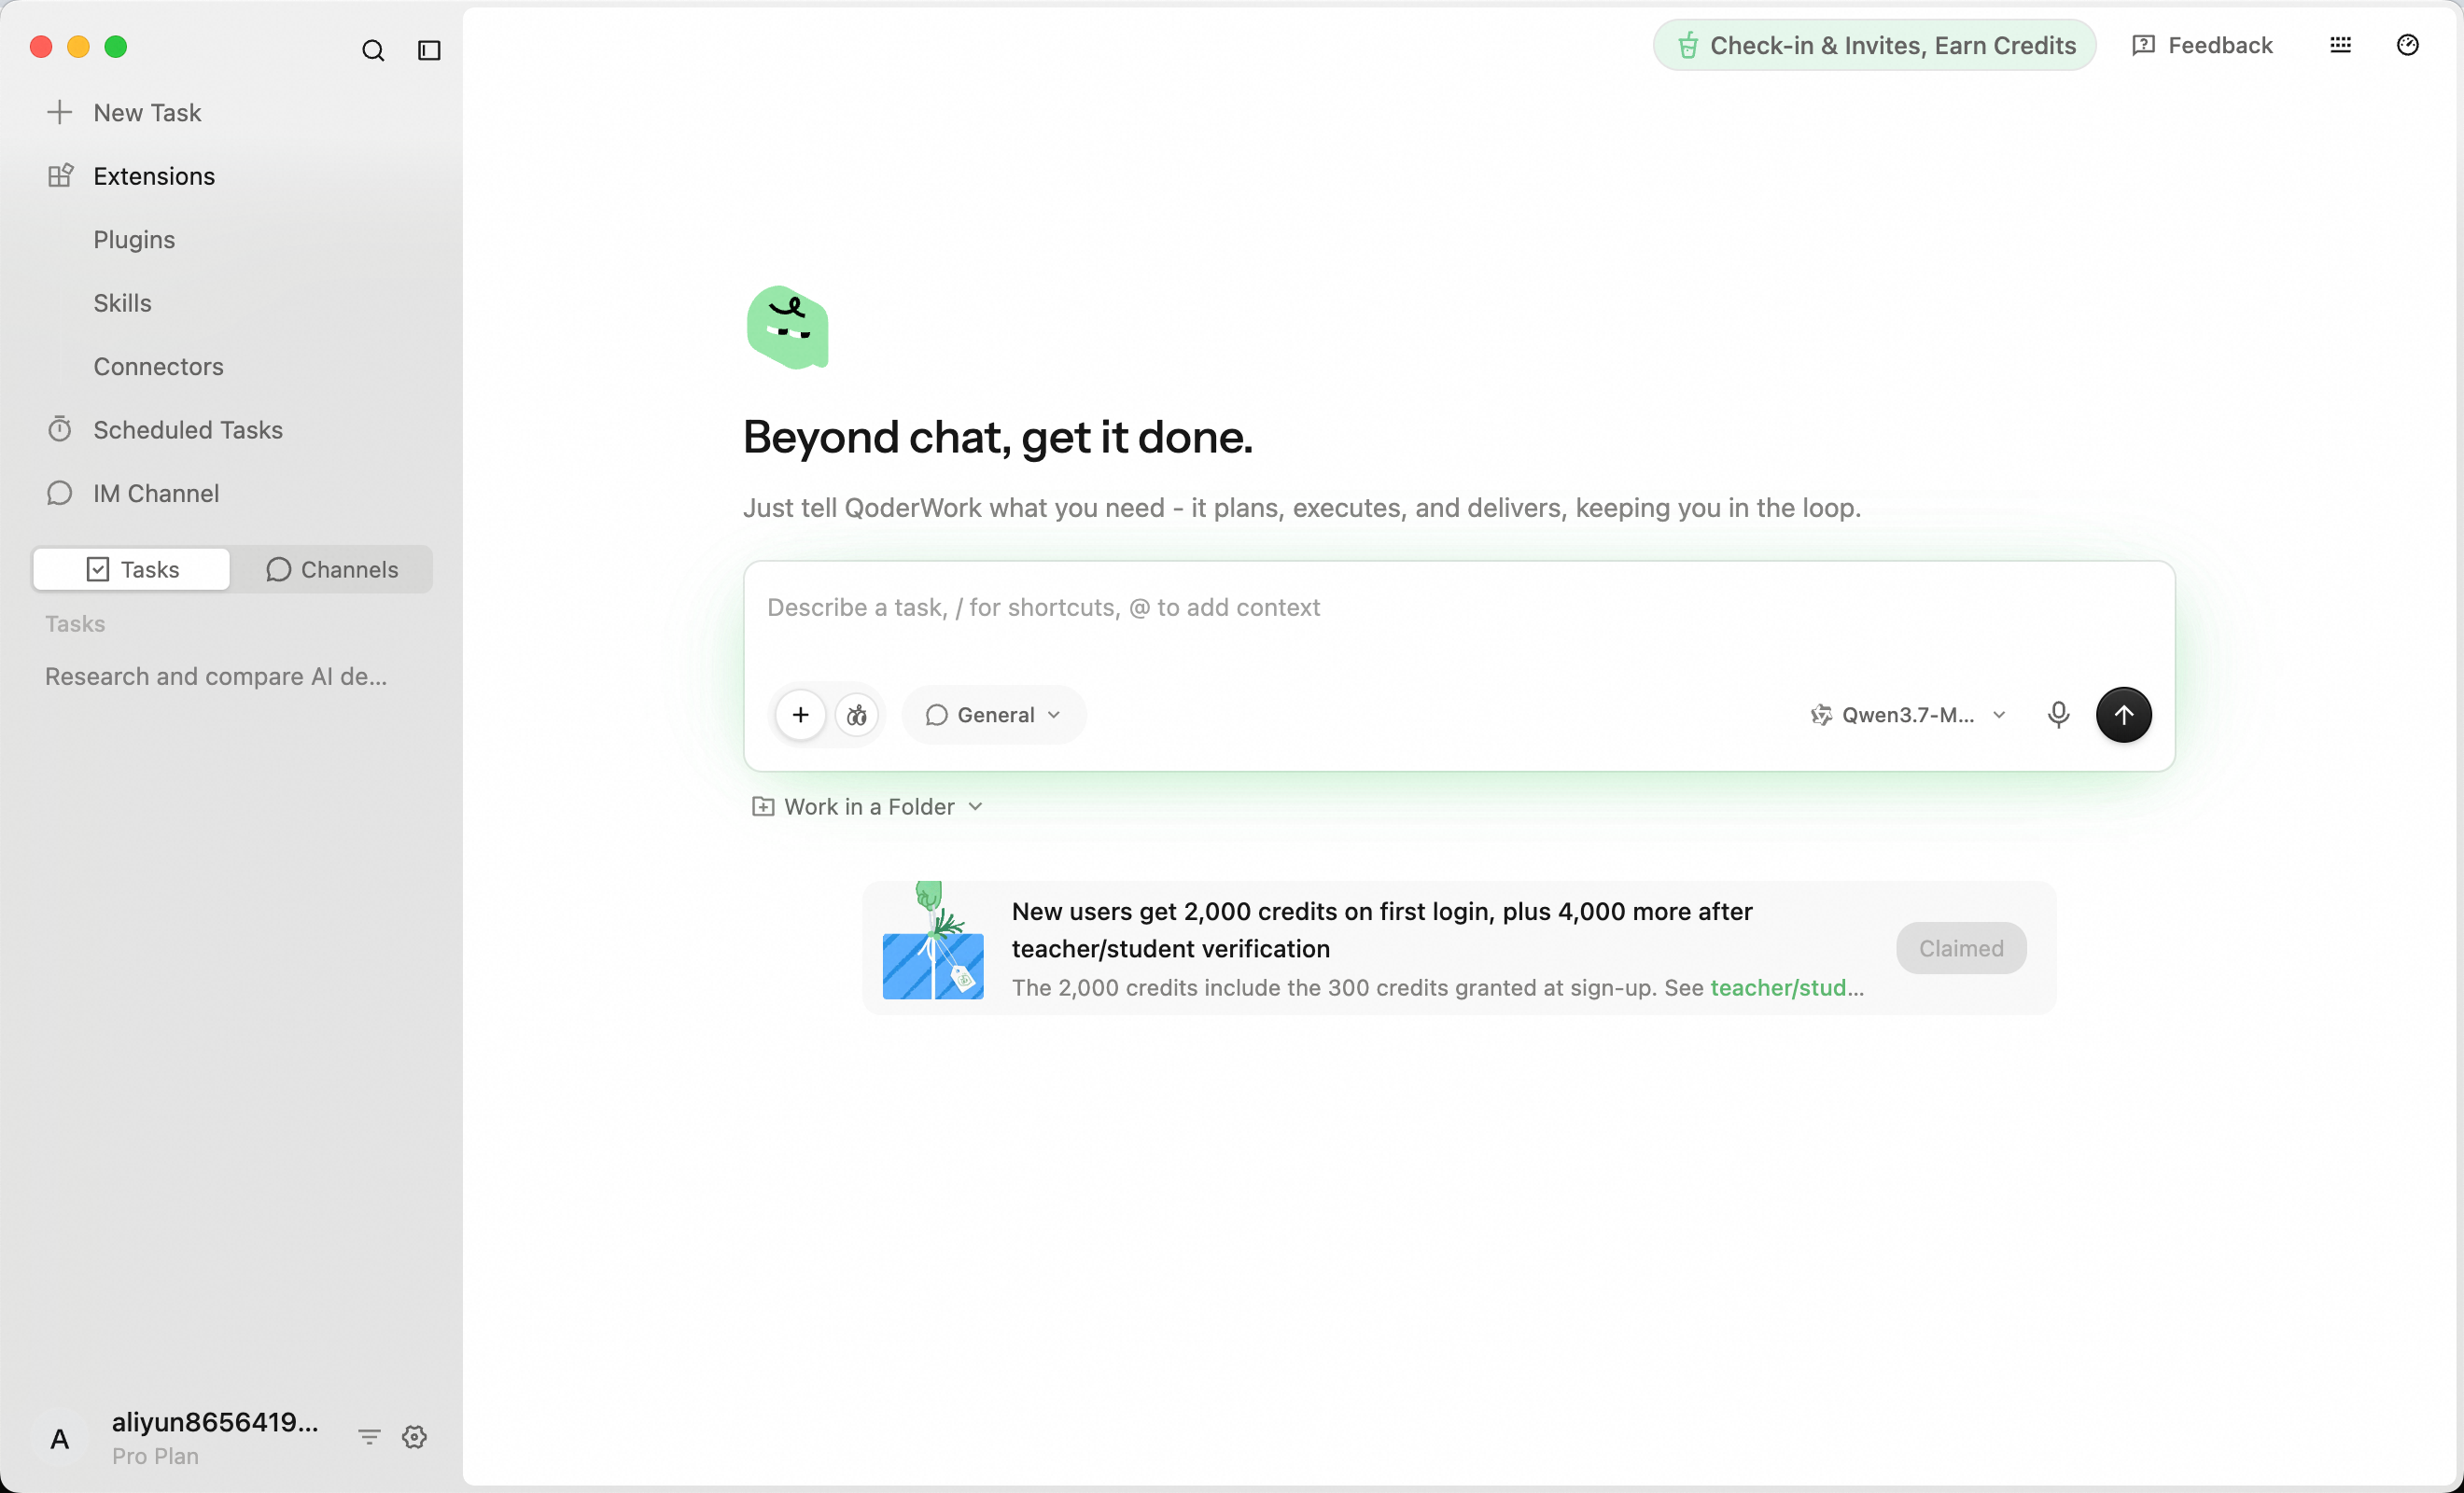 The sidebar consolidates frequently used features from top to bottom: New Task, Extensions (Expert Suites / skills / connectors), Scheduled Tasks, and IM Channels. It also includes a toggle for your Tasks / Channels history. At the bottom left are the account area and the Settings gear icon.
For a detailed description of each feature, including the account shortcut menu, see Interface Layout.
The sidebar consolidates frequently used features from top to bottom: New Task, Extensions (Expert Suites / skills / connectors), Scheduled Tasks, and IM Channels. It also includes a toggle for your Tasks / Channels history. At the bottom left are the account area and the Settings gear icon.
For a detailed description of each feature, including the account shortcut menu, see Interface Layout.
Now that everything is set up, let's put QoderWork EN to work. Click New Task in the sidebar to open the task editor.
The interface is a clean canvas with the headline "More than chat. Get it done." above an input box. For your first task, keep the default General-purpose Workbench + Standard Model. Describe the outcome you want, then press Enter:
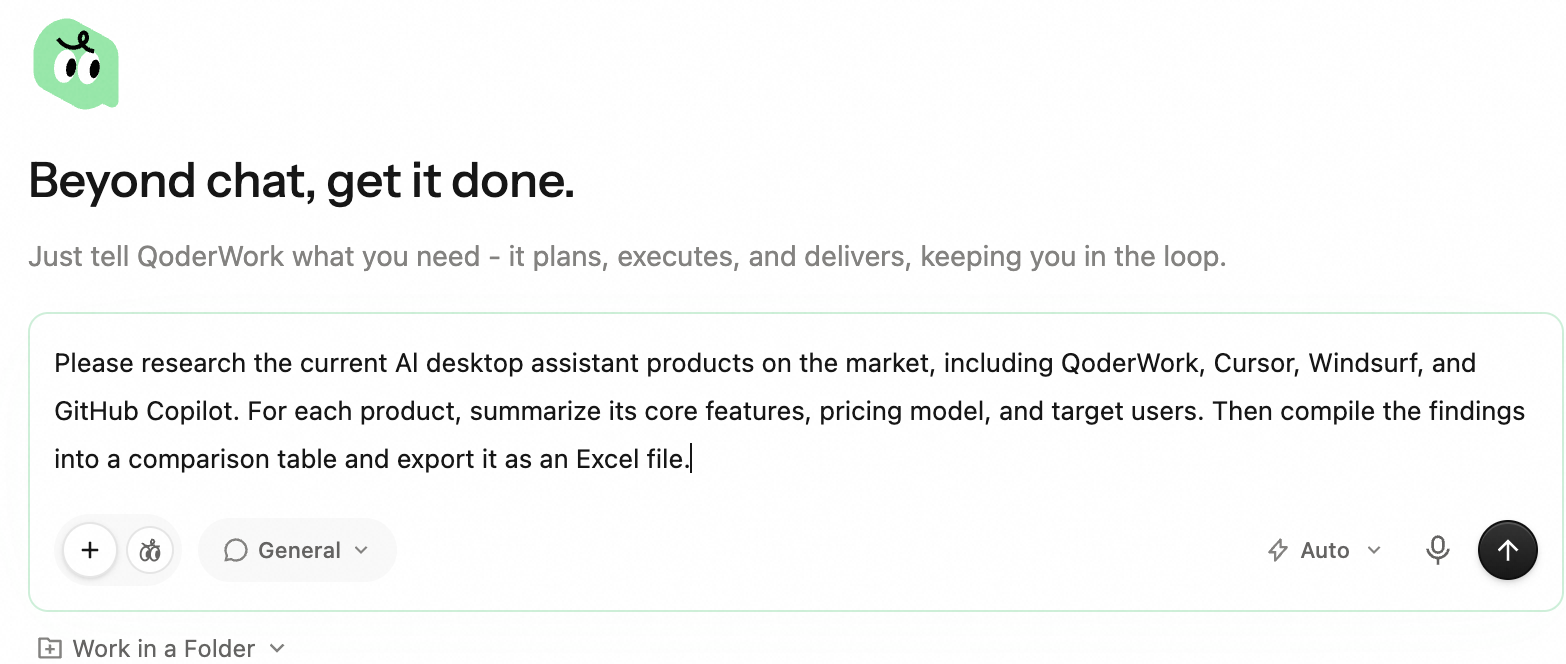 From this point on, you only need to observe, answer clarifying questions, and collect the artifacts. You do not need to manage every step.
For details on using the workbench, selecting a model, and choosing a working directory, see Task Conversation.
From this point on, you only need to observe, answer clarifying questions, and collect the artifacts. You do not need to manage every step.
For details on using the workbench, selecting a model, and choosing a working directory, see Task Conversation.
For complex or ambiguous requests, QoderWork EN won't start working immediately. Instead, it may ask one or two clarifying questions, such as "Should I include open-source alternatives?" or "Should the prices be in USD or local currency?" Answering these questions takes only a few seconds and can prevent significant rework later. Simply reply in the conversation to start the task. This step is skipped if your request is already clear enough.
While the task is running, the workspace splits into two sections. The left side remains the conversation, showing the AI's explanations and intermediate updates. The right side displays the Task Monitor, which provides a real-time view of the task's execution, including the plan, generated artifacts, and the Skills & MCP services in use.
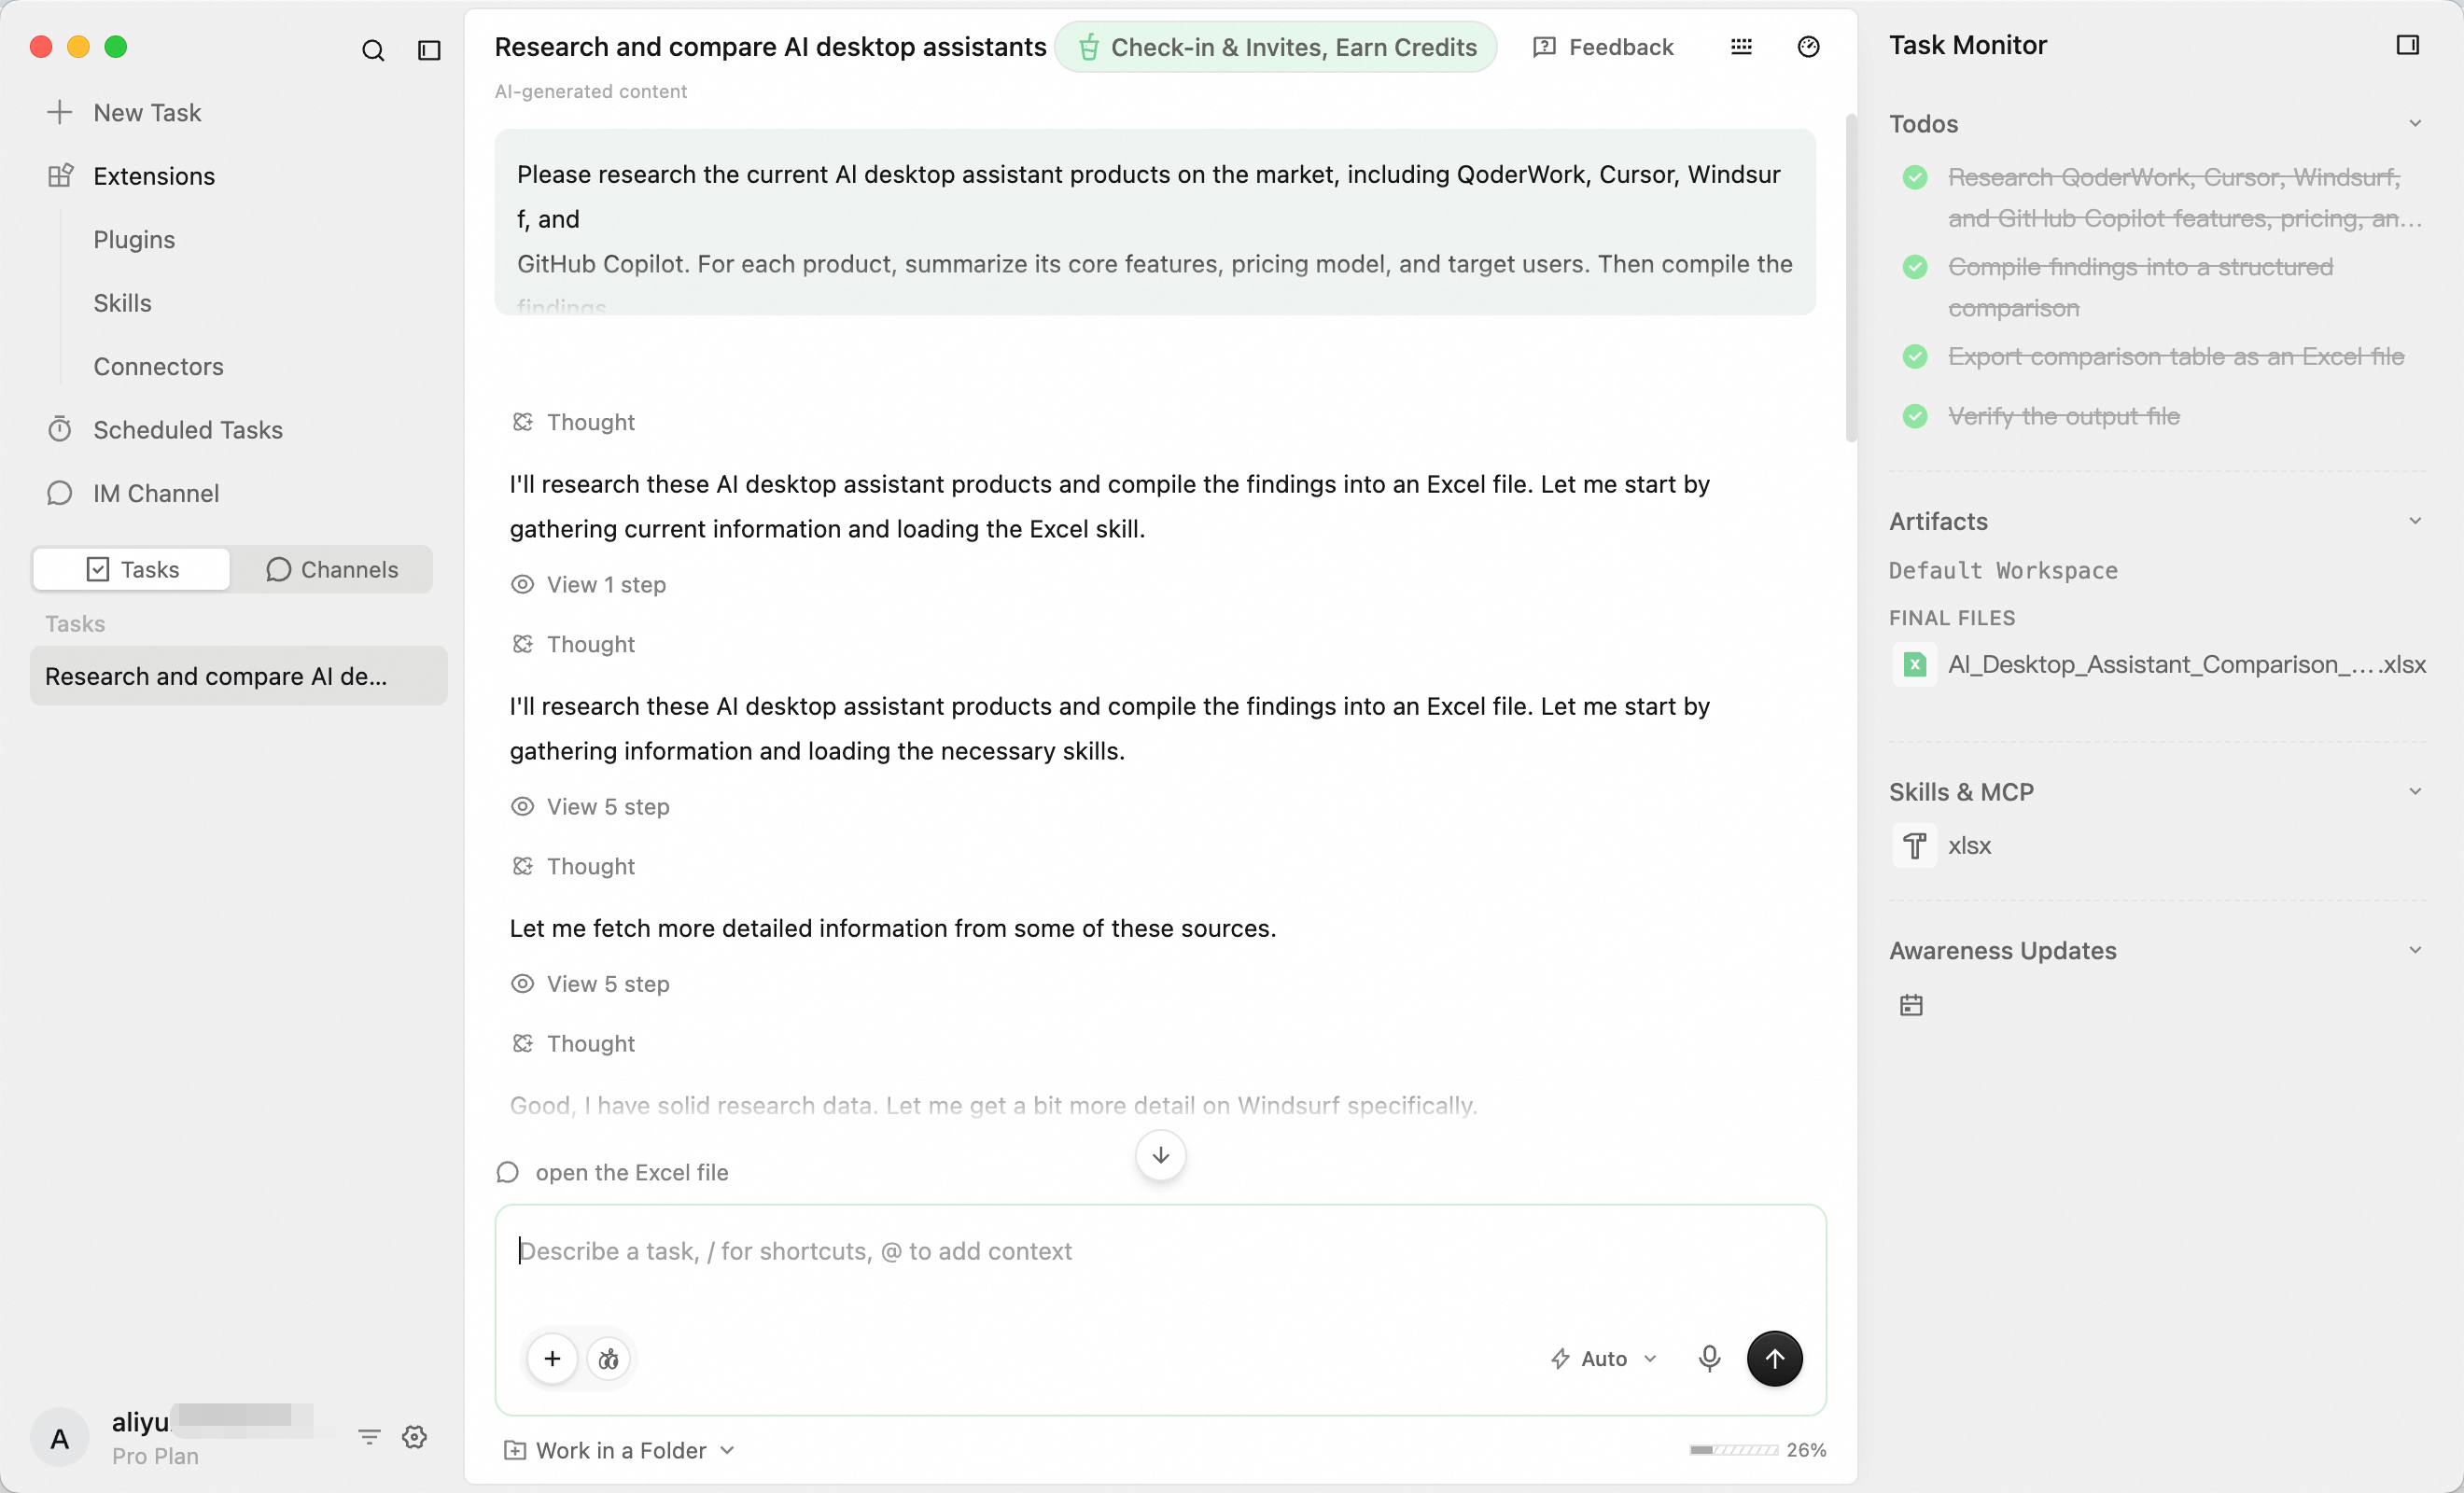 If the process goes off track, you can add a new instruction in the conversation at any time. The instruction is queued and executed after the current step finishes. QoderWork EN retains the full context, so you don't need to start over.
When the task is complete, QoderWork EN provides two things: a summary in the conversation explaining what it did, and one or more artifacts—the actual downloadable files, like the Excel spreadsheet from our example. Artifacts are real local files, created and saved directly on your computer, ready to be opened, edited, or moved.
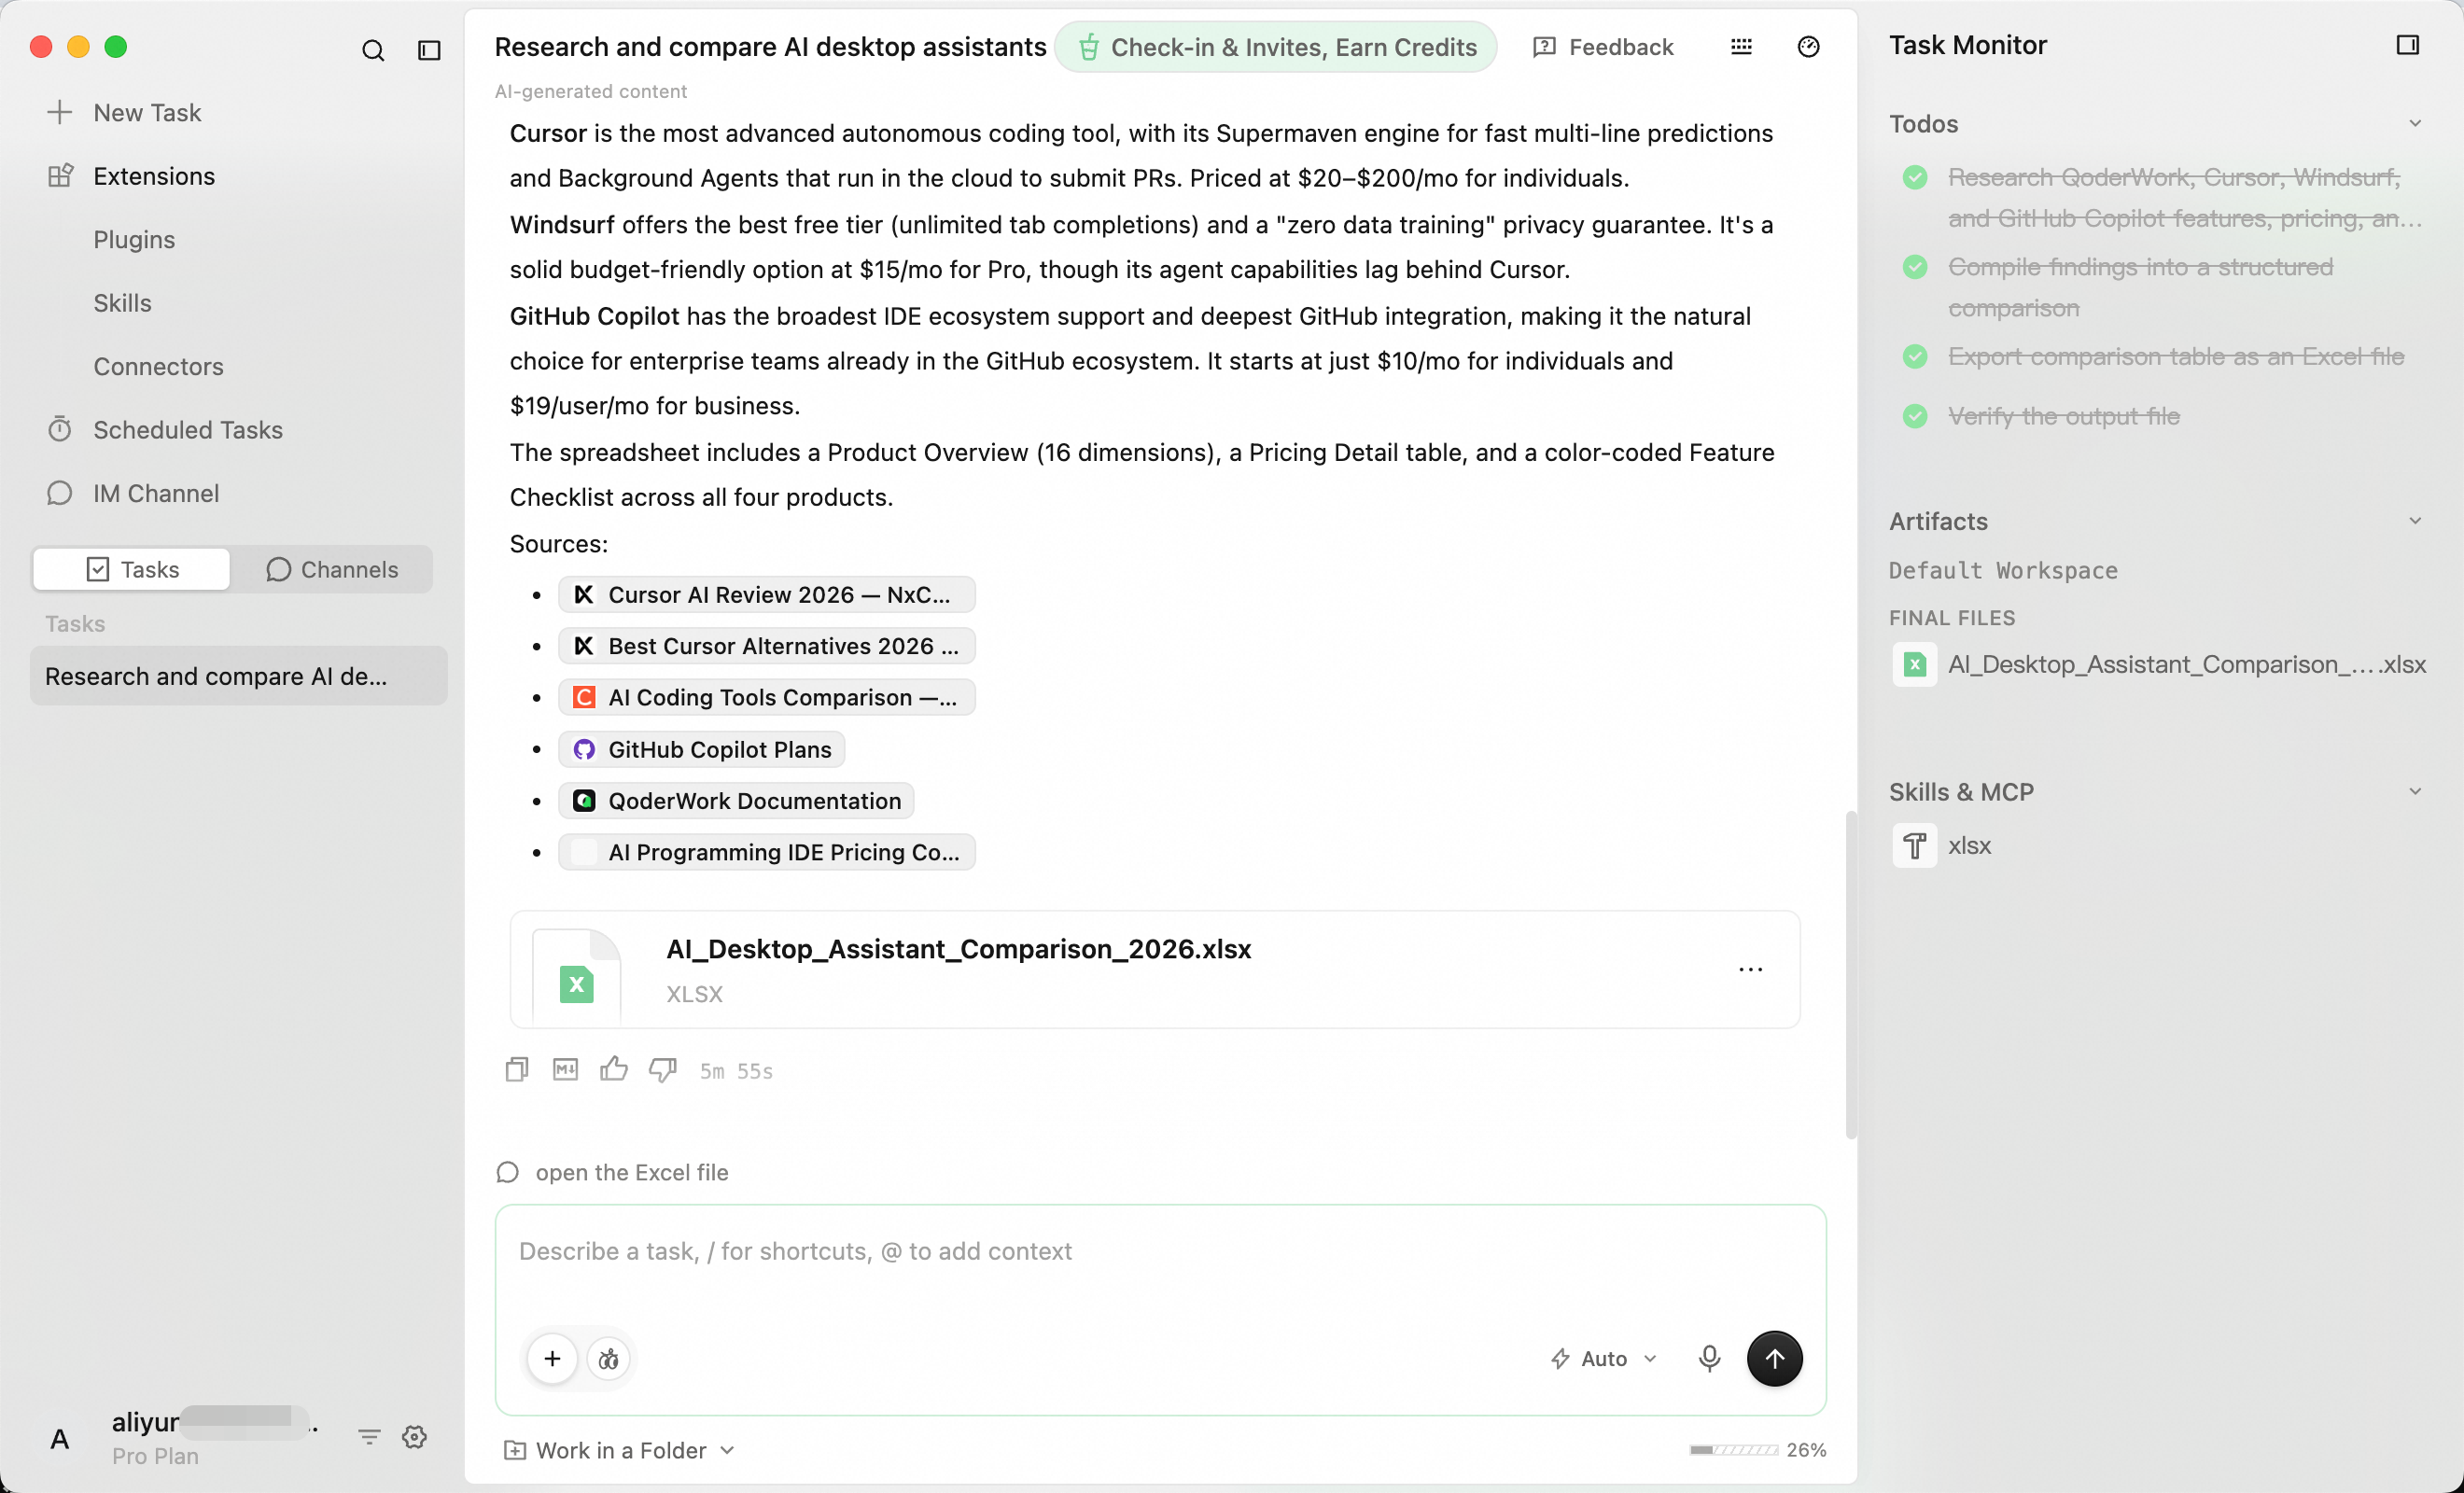 Artifacts remain attached to their task and can be accessed later from the Tasks list in the sidebar.
The following three terms are used throughout the product. Understanding them will make it much easier to navigate the QoderWork EN interface.
1. Download QoderWork
Open the QoderWork CN download page in your browser and click the macOS or Windows button to download the installer.
- macOS 14 or later, compatible with both Apple Silicon and Intel chips.
- Windows 10 or later, 64-bit version only.
The Windows installer is available in a System version (installs for all users on the computer and requires administrator privileges) and a User version (installs only for the current user and does not require administrator privileges)—choose the User version if you don't have administrator privileges. The macOS installer comes in versions for Apple Silicon and Intel chips; the download page automatically highlights the correct version for your Mac. For details, see Windows installation or macOS installation.
macOS installation
After downloading, double-click the .dmg file and drag the QoderWork EN icon into the Applications folder. Once the copy is complete, eject the disk image, then launch the application from Launchpad or /Applications/QoderWork EN.app.
On first launch, macOS may show a prompt that the application is from the internet or that the developer cannot be verified. Go to System Settings → Privacy & Security, scroll to the bottom, find the notification for QoderWork EN, and click Open Anyway. This step is only required once.
Windows installation
Windows offers two types of installers. They are functionally identical, differing only in installation scope and required permissions:
System version: Choose this version for personal computers where you have administrator privileges, or for machines where multiple users need to share one QoderWork EN installation.
User version: Choose this version for computers where you lack administrator privileges or for corporate-managed machines.
When in doubt, choose the User version. It's the easiest to install because it doesn't require administrator privileges.
If a SmartScreen prompt appears stating the publisher is unrecognized, click More info → Run anyway to continue.
2. Sign in
When you launch QoderWork EN for the first time, a welcome screen prompts you to sign in. The left side of the screen contains the Sign In / Sign Up button, a language switcher, and a Network Settings link for proxy configuration. The right side displays the product slogan.
Task history is stored locally on your device and does not sync across devices. If you sign in on a different computer, you will not see the task history from your other devices.
3. Explore the workspace
The main QoderWork EN window is divided into two parts: a vertical navigation sidebar on the left and the workspace on the right, which houses conversations, the Task Monitor, and artifacts.
4. Run your first task
Now that everything is set up, let's put QoderWork EN to work. Click New Task in the sidebar to open the task editor.
The interface is a clean canvas with the headline "More than chat. Get it done." above an input box. For your first task, keep the default General-purpose Workbench + Standard Model. Describe the outcome you want, then press Enter:
What happens after you press Enter
Step 1: Clarifying questions (optional)
For complex or ambiguous requests, QoderWork EN won't start working immediately. Instead, it may ask one or two clarifying questions, such as "Should I include open-source alternatives?" or "Should the prices be in USD or local currency?" Answering these questions takes only a few seconds and can prevent significant rework later. Simply reply in the conversation to start the task. This step is skipped if your request is already clear enough.
Step 2: Monitor the task
While the task is running, the workspace splits into two sections. The left side remains the conversation, showing the AI's explanations and intermediate updates. The right side displays the Task Monitor, which provides a real-time view of the task's execution, including the plan, generated artifacts, and the Skills & MCP services in use.
Step 3: Collect the artifacts
When the task is complete, QoderWork EN provides two things: a summary in the conversation explaining what it did, and one or more artifacts—the actual downloadable files, like the Excel spreadsheet from our example. Artifacts are real local files, created and saved directly on your computer, ready to be opened, edited, or moved.
Not satisfied with the result? No need to start over. Just continue the conversation in the same chat. For example, you can say "Sort the table by price, from lowest to highest" or "Add another column for the usage limits of the free plan." QoderWork EN will use the full task context to modify the artifacts, making iteration highly efficient.
Key concepts
The following three terms are used throughout the product. Understanding them will make it much easier to navigate the QoderWork EN interface.
| Concept | Description | Location |
|---|---|---|
| clarification | A short confirmation before a task starts, used to clarify ambiguous requirements. | In the conversation, right after you submit a task. |
| Task Monitor | The execution panel that shows the task plan, tool calls, skills used, and files being processed in real time. | On the right side of the workspace while a task is running. |
| artifact | A concrete file produced by a task, such as a spreadsheet, slide deck, report, or code. | In the conversation area after a task is finished, and in the Tasks list. |