

Voice input lets you speak to QoderWork CN instead of typing. Whether you are describing complex tasks, dictating long passages, or giving quick commands, voice input enables more natural and fluid communication with the AI.
Voice input is especially useful when speaking is more convenient than typing—for example, when describing a visual layout, walking through a multi-step workflow, or adding follow-up edits while reviewing results.
Before you use voice input, confirm the following:
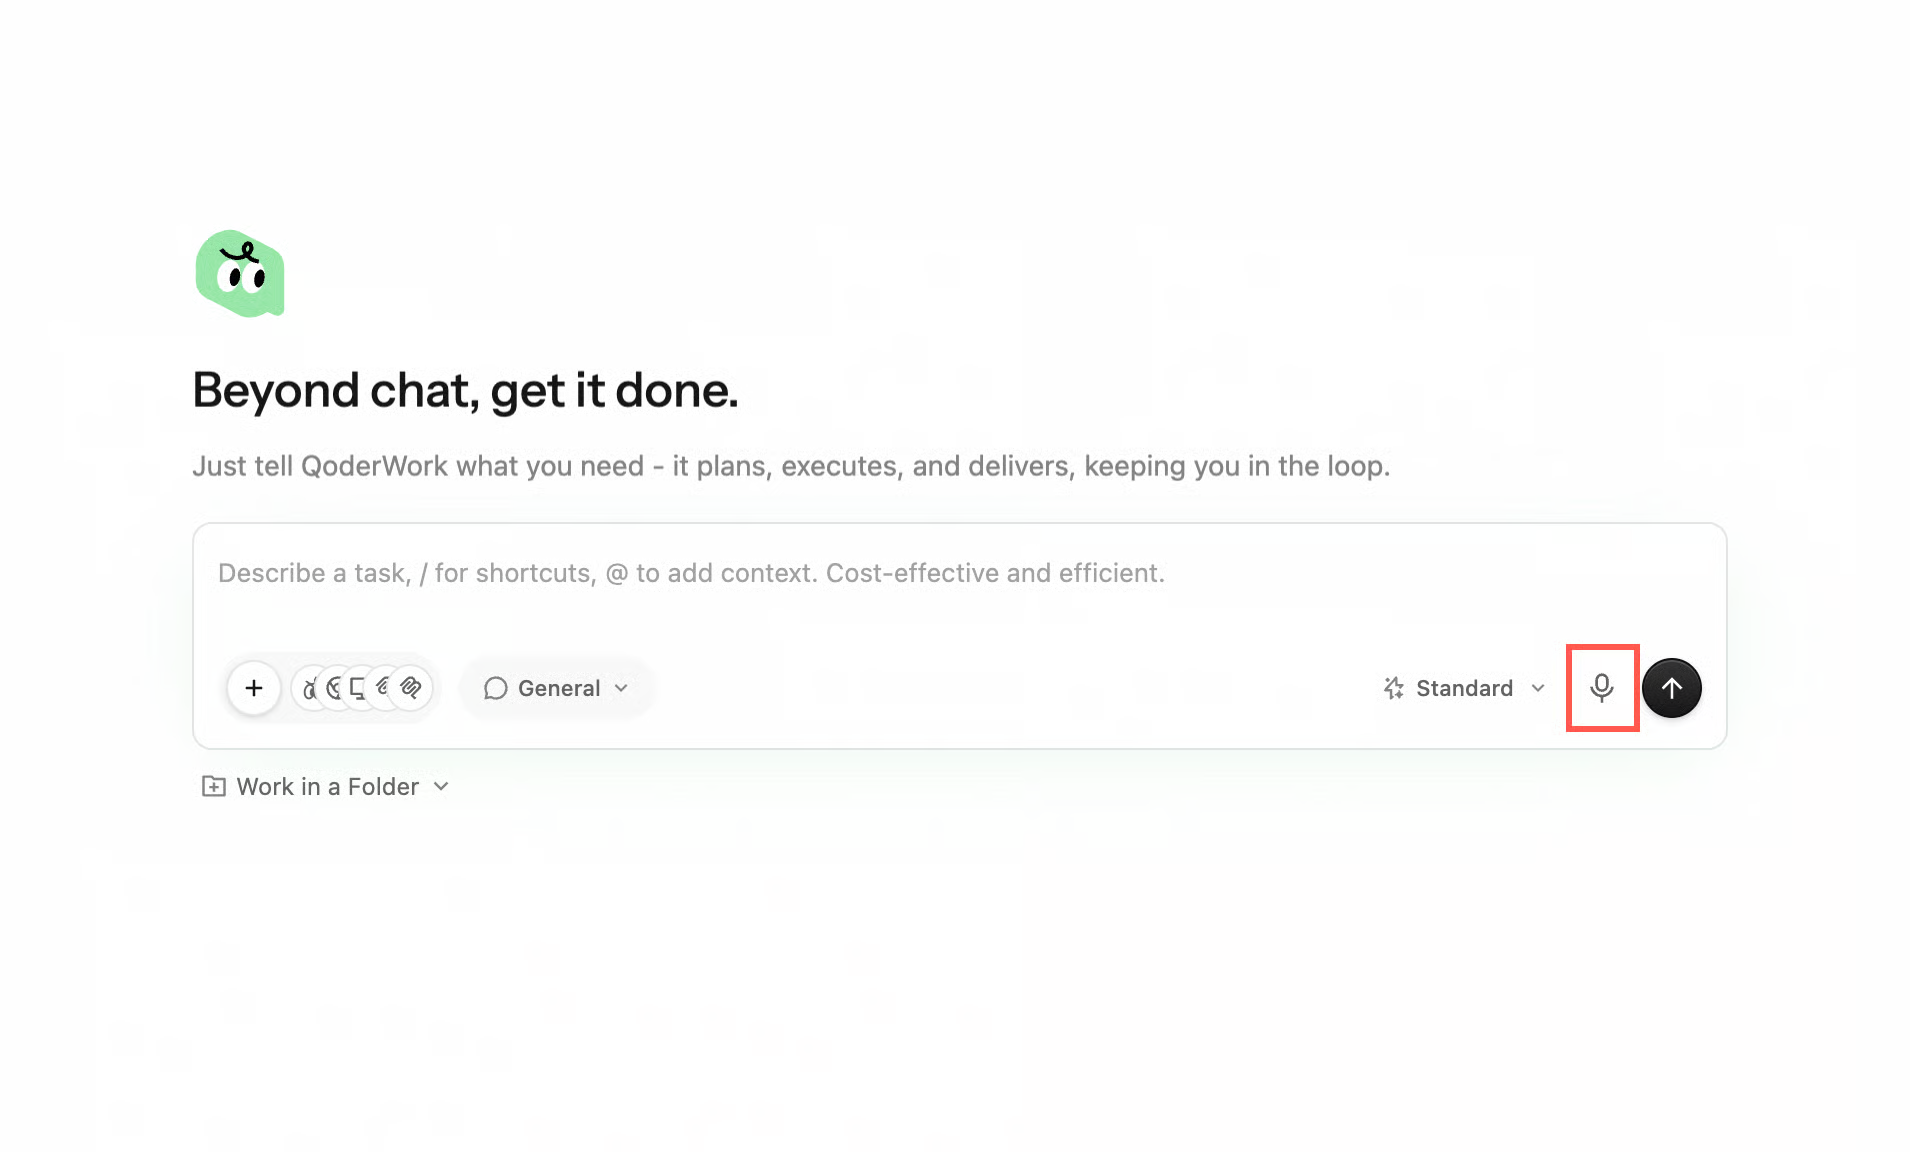
By default, press and hold the Fn key to start voice input. Alternatively, you can click the microphone icon to the right of the chat input field. The icon changes to indicate that recording is in progress.
Speak clearly at a natural pace. You can describe a task, ask a question, or dictate content. There is no strict time limit, so you can speak for as long as you need.
After you stop speaking, your words appear as transcribed text in the input field. Check the text for accuracy.
You can freely edit the transcribed text—fix misrecognized words, add punctuation, or adjust wording.
Once you confirm the text is correct, press Enter or click the send button. QoderWork CN processes the transcribed message just as it would typed input.
Voice input works seamlessly with other QoderWork CN features:
Voice + file attachments. Attach a file first, then use your voice to describe what you want to do with it. For example, after attaching a PDF, say "Summarize the key points and list the action items."
Voice for follow-up edits. After QoderWork CN delivers a result, use your voice to provide quick feedback, such as "Make the title bigger" or "Add a section about risks."
Prerequisites
Before you use voice input, confirm the following:
- Microphone permission: QoderWork CN needs access to your system microphone. A system prompt will request permission the first time you use the feature. You can also grant it manually in your system settings (macOS: System Settings > Privacy & Security > Microphone).
- System speech recognition: Voice input relies on your operating system's built-in speech recognition engine. The supported languages depend on the language packs installed on your system.
For the best recognition accuracy, make sure the language you intend to use is included in your system's language settings. You can add a language without changing your system's display language.
How to use
Step 1: Start recording
By default, press and hold the Fn key to start voice input. Alternatively, you can click the microphone icon to the right of the chat input field. The icon changes to indicate that recording is in progress.
Customize the shortcut: To change the trigger key, go to Settings → Voice Input → Trigger Key, or hover over the microphone icon in the input field and click Edit Shortcut.
Step 2: State your request
Speak clearly at a natural pace. You can describe a task, ask a question, or dictate content. There is no strict time limit, so you can speak for as long as you need.
Step 3: Review the transcribed text
After you stop speaking, your words appear as transcribed text in the input field. Check the text for accuracy.
Step 4: Edit as needed
You can freely edit the transcribed text—fix misrecognized words, add punctuation, or adjust wording.
Step 5: Send the message
Once you confirm the text is correct, press Enter or click the send button. QoderWork CN processes the transcribed message just as it would typed input.
Best practices
- Speak at a moderate pace and enunciate clearly. Speaking too quickly or mumbling can lead to transcription errors. A normal conversational speed is ideal.
- Pause briefly between sentences. This helps the speech recognition engine segment sentences correctly and improves automatic punctuation accuracy.
- Draft with your voice, then refine with your keyboard. Use your voice to quickly capture your thoughts, then use your keyboard for precise edits and polishing.
- Ideal for long descriptions. For multi-paragraph instructions, detailed operational guidance, or complex explanations, speaking is much faster than typing.
- Reduce background noise. Using voice input in a quiet environment significantly improves recognition accuracy.
Use cases
| Scenario | Example |
|---|---|
| File organization | "Organize the files on my desktop. Put PDFs in one folder, images in another, and documents in a third." |
| Document creation | "Write a Q2 project status report for me. Include three sections: progress, challenges, and next steps." |
| Browser tasks | "Open the company intranet, find the latest expense report template, and download it to my Documents folder." |
| Data analysis | "Open the sales spreadsheet on my desktop and create a monthly revenue trend chart for this year." |
| Quick follow-up | "Change it to a bar chart and add value labels to each bar." |
Combining with other features
Voice input works seamlessly with other QoderWork CN features:
Voice + file attachments. Attach a file first, then use your voice to describe what you want to do with it. For example, after attaching a PDF, say "Summarize the key points and list the action items."
Voice for follow-up edits. After QoderWork CN delivers a result, use your voice to provide quick feedback, such as "Make the title bigger" or "Add a section about risks."
Next steps
- App Snapshot—Use a screenshot of the frontmost app as conversation context.
- Model Selection—Learn about available models and how to choose one.
- New Task—Learn how to select a model, workspace, and extension when creating a new task.